Pricing
Summary
The Pricing modules are used to change the selling price and the RRP of products shown on site.
Pricing for a SKU is set against a particular site, locale, currency and country group. See the Glossary at the bottom of this page for a description of each of these terms.
Please speak with your account manager to discuss enabling this module for your organisation.
Homepage
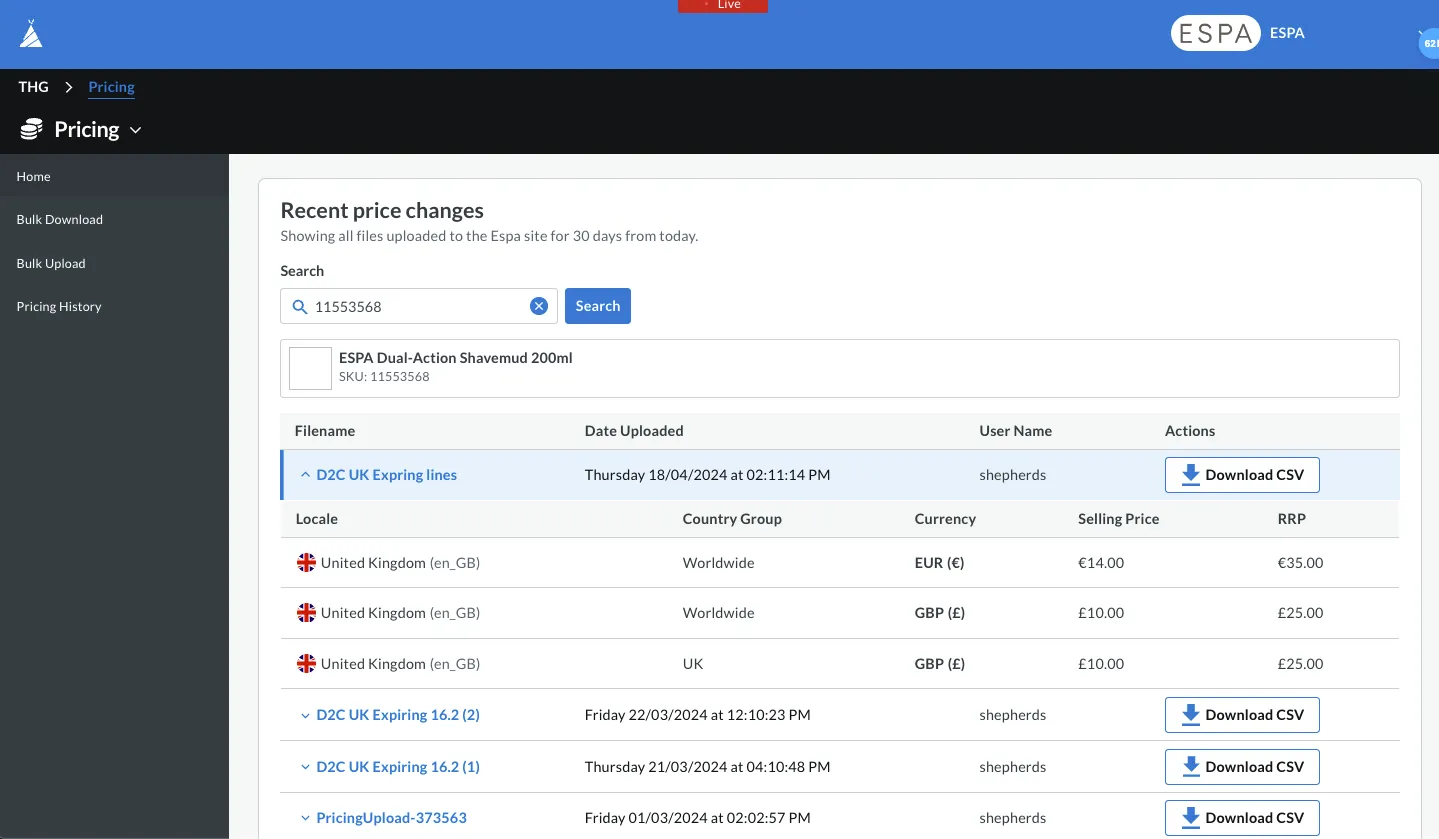
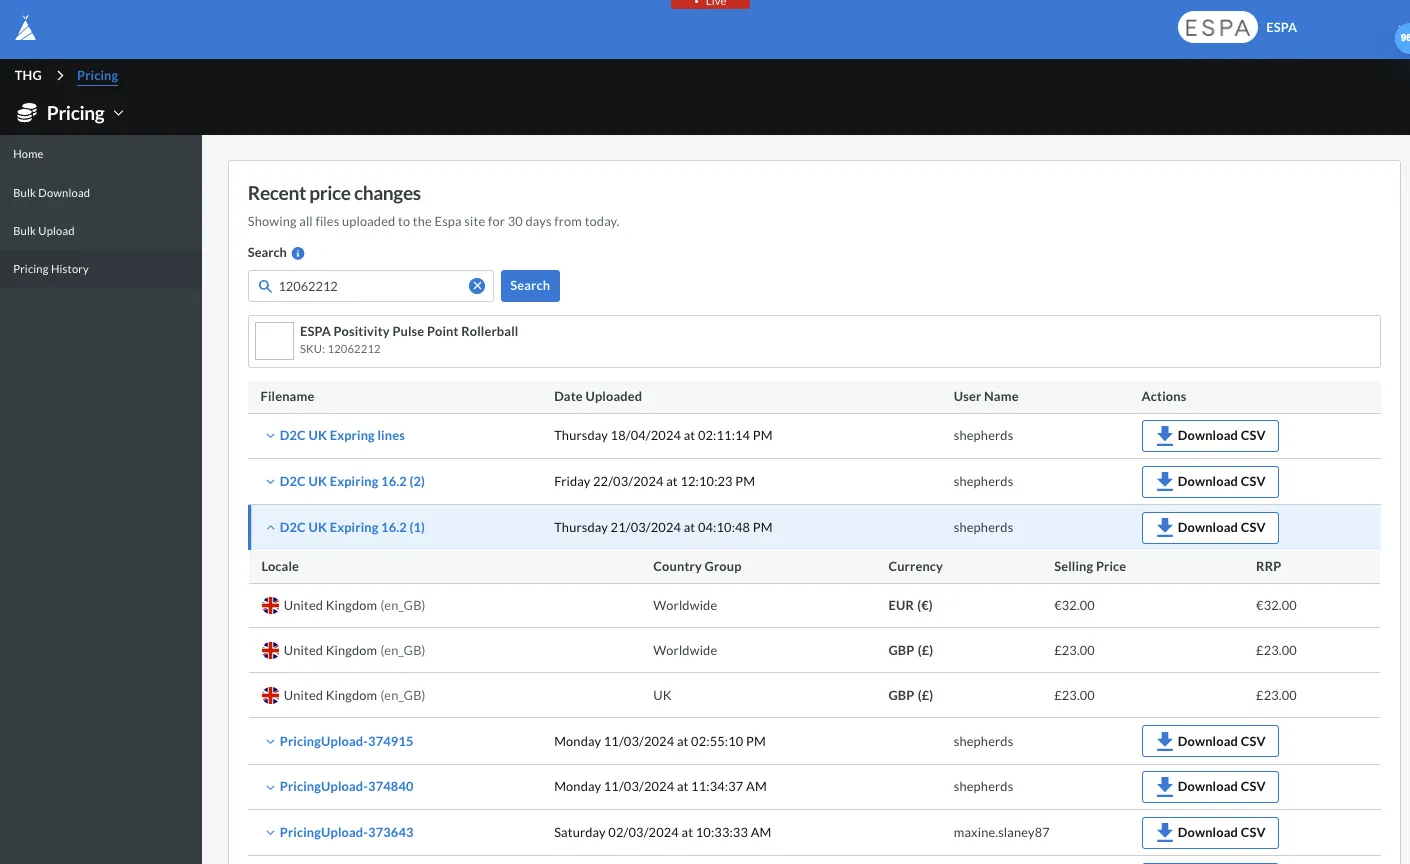
Within Recent price changes, view price change upload files which have been uploaded for the specified site within the past 30 days. Click the Download CSV button within the actions column to download the referenced file.
To filter results based on a particular SKU, use the search bar. Click the dropdown within the Filename column to see which selling price and RRP were uploaded for the SKU in that file.
Bulk Download
Use this page to download current pricing data in the system for a given set of products.
These files are also to be used as templates for pricing upload files; i.e. download the file, change the pricing, upload via the Bulk Upload module. There are four ways to filter which products you download pricing for: Manual, Product List, DDL Search, All.
Manual
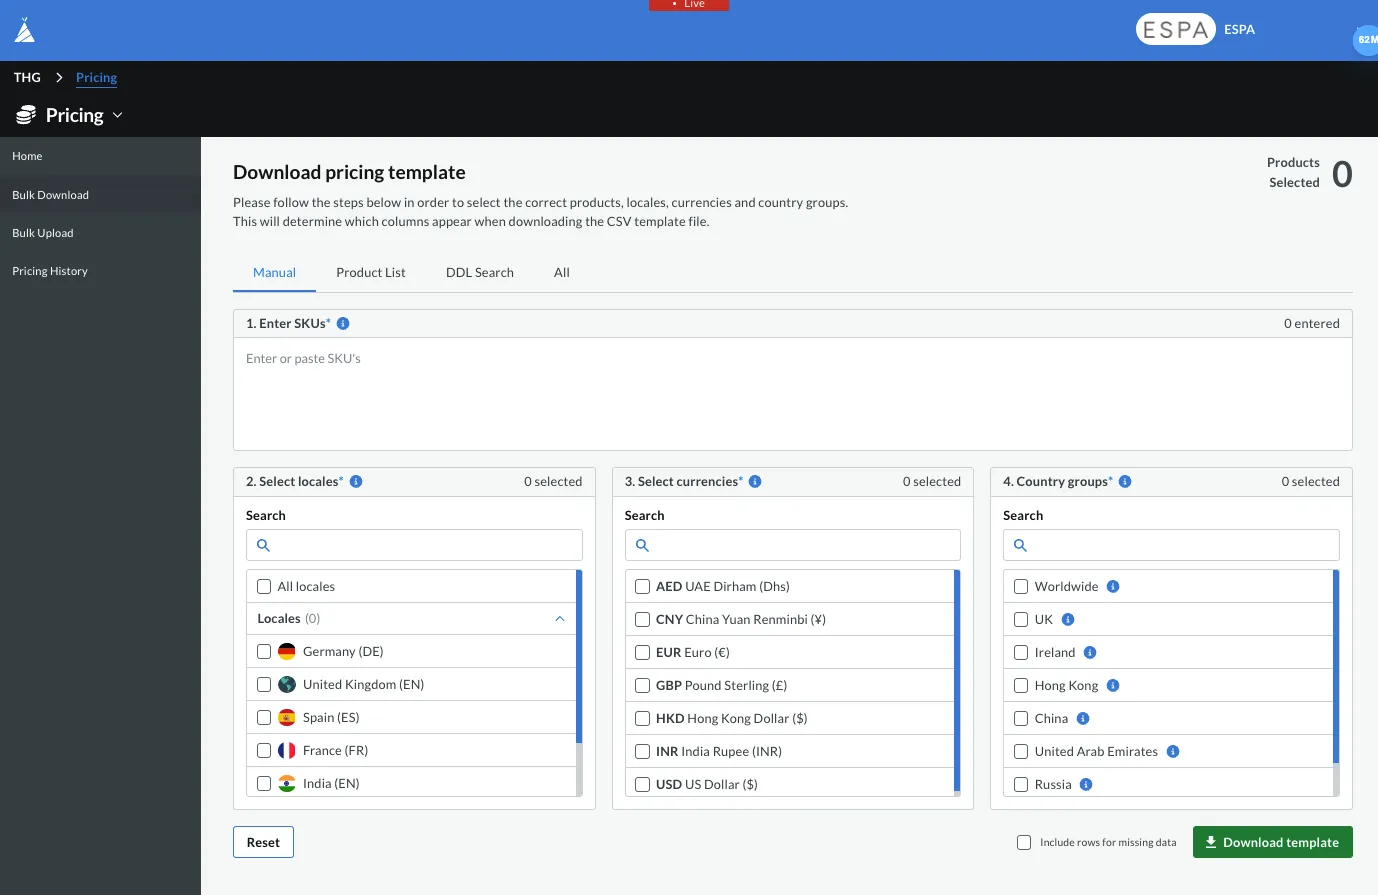
This tab is to be used if you have a known set of products you wish to view or change prices for.
Enter the SKUs you wish to download pricing for.
Select which locales, currencies and country groups you wish to include. Once ready, click the Download template button. Click the Include rows for missing data tickbox if you wish to include a row for a product in your template file, even if previously pricing has not been set for this product.
Product List
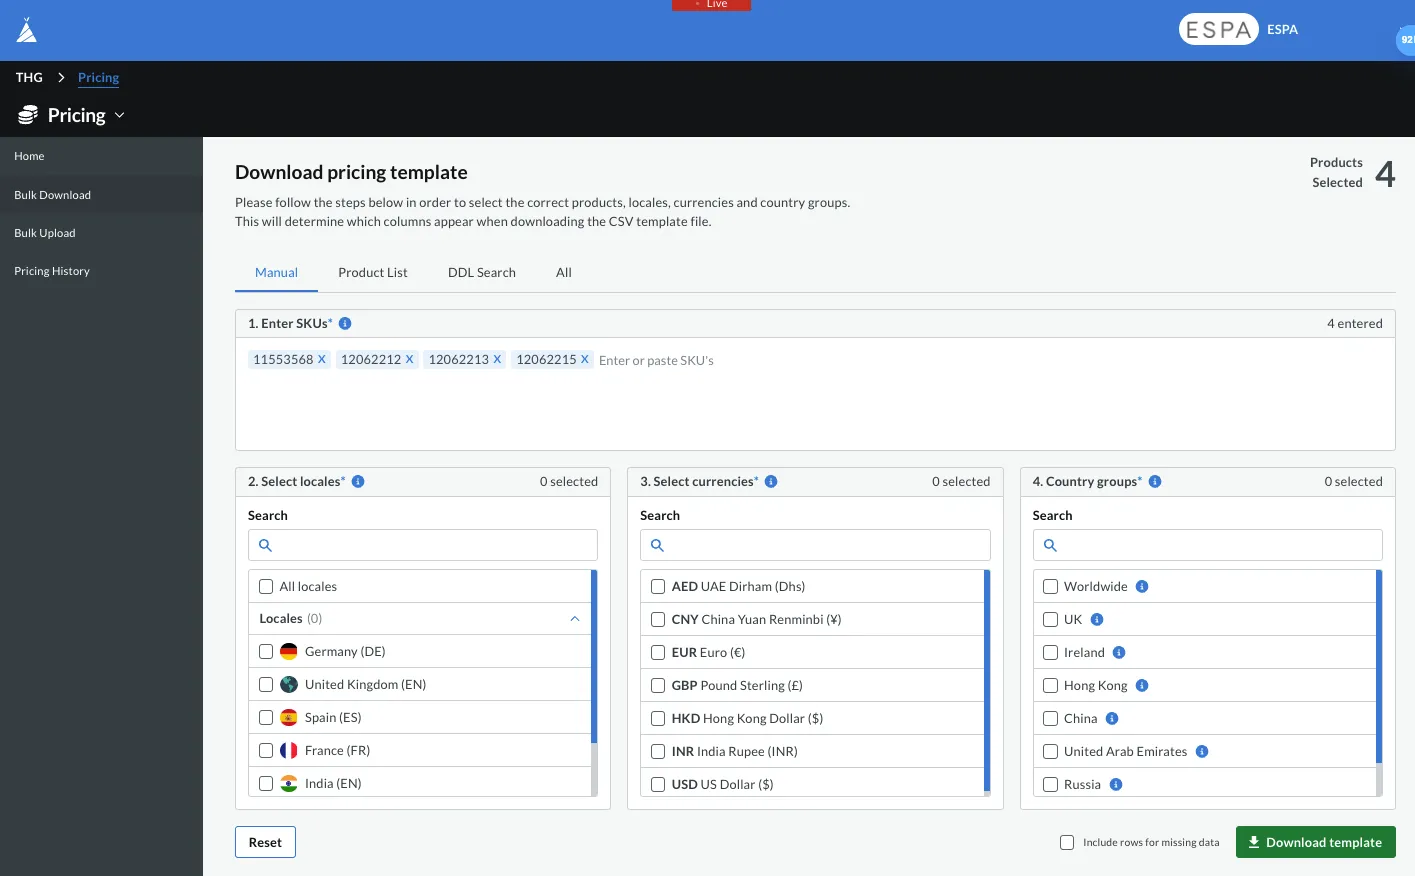
This tab is to be used to view or change pricing for all products within a particular product list.
Select which subsite you wish to download pricing for. Then search for the product list you require.
Select which locales, currencies and country groups you wish to include. Once ready, click the Download template button. Click the Include rows for missing data tickbox if you wish to include a row for a product in your template file, even if previously pricing has not been set for this product.
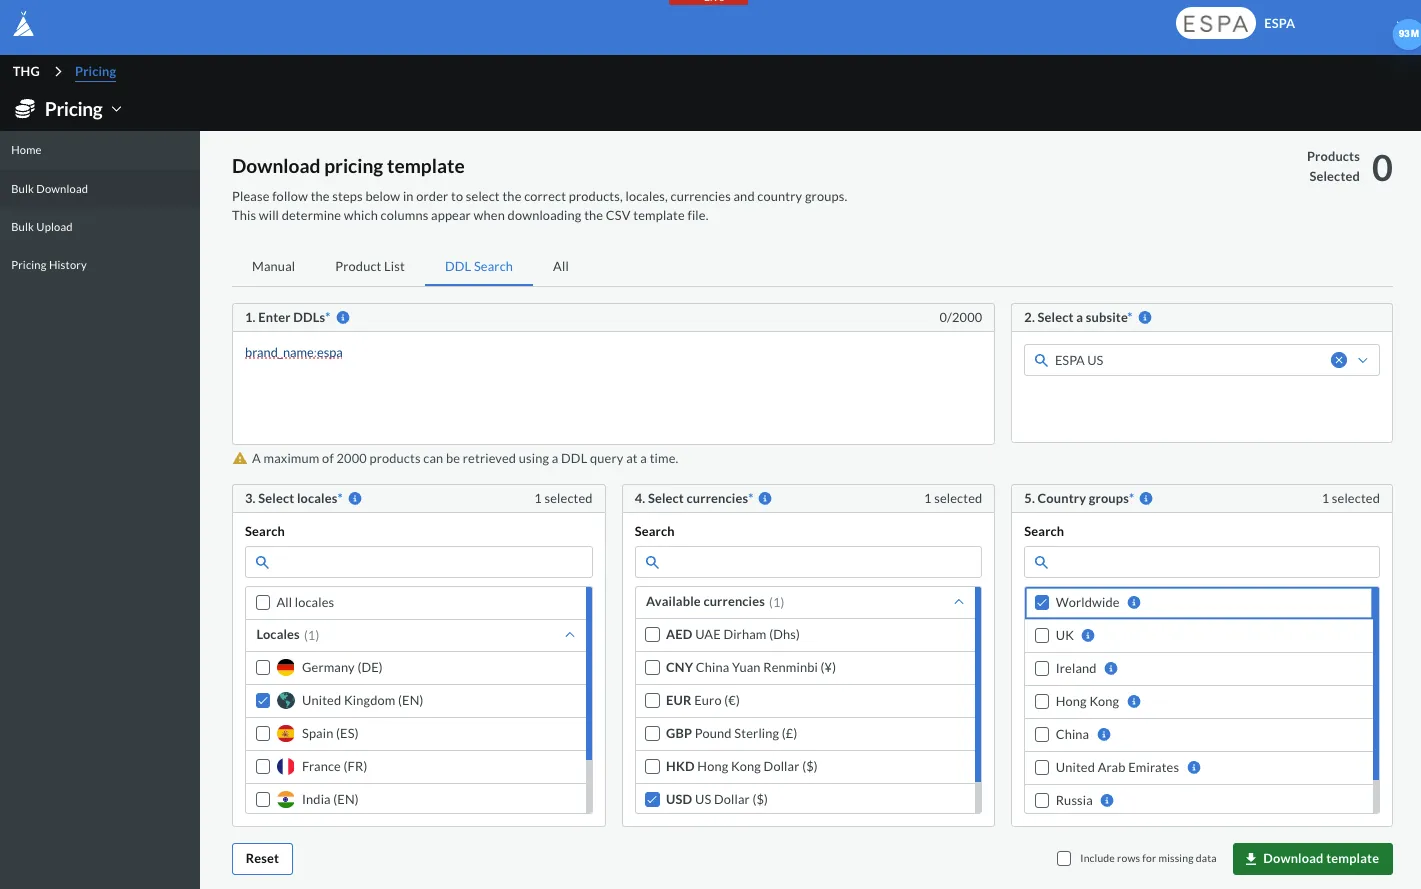
DDL Search
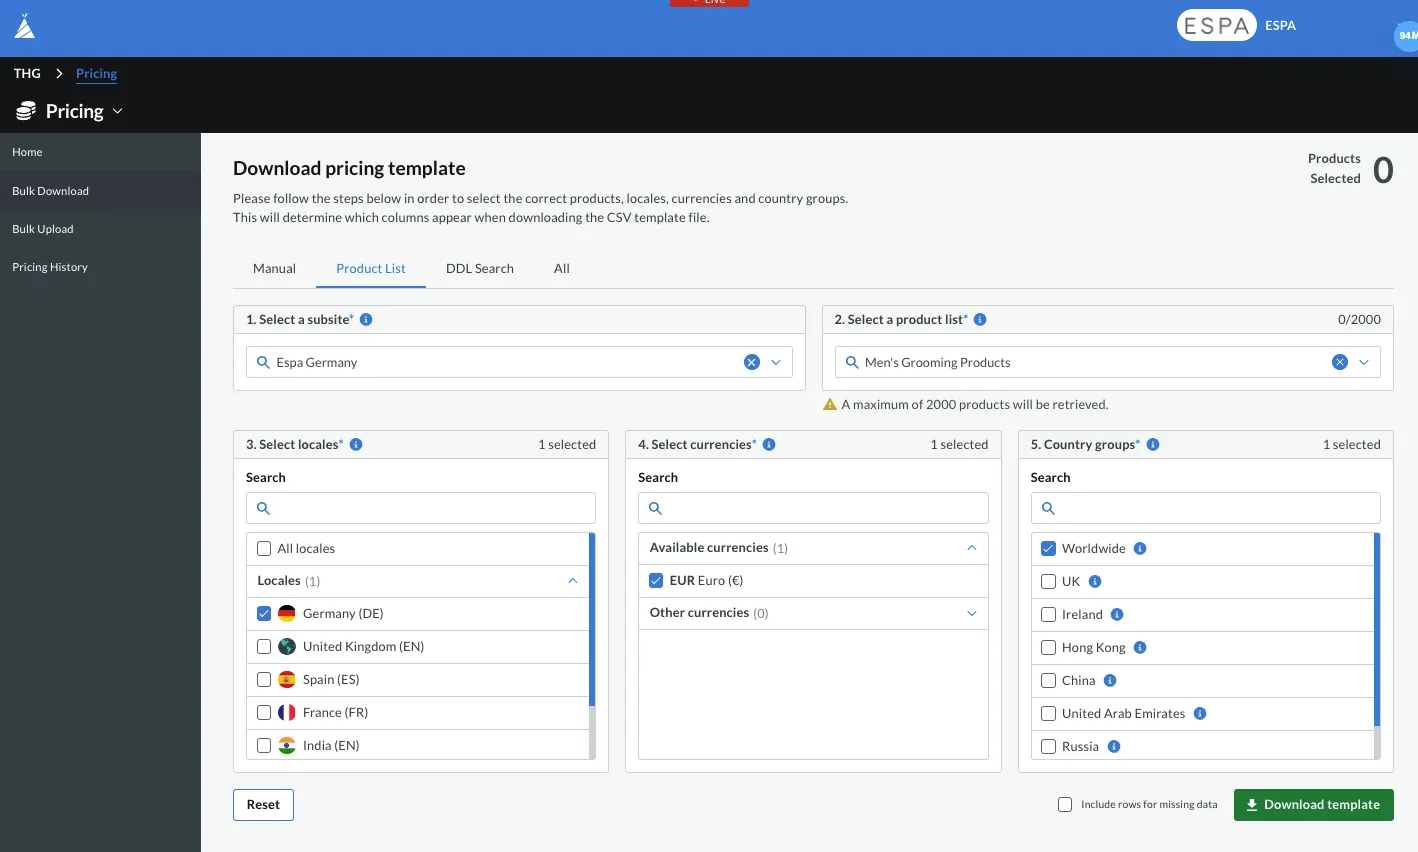
This tab is to be used to view or change pricing for all products retrieved via a DDL query.
Enter the DDL query. Then select which subsite you wish to retrieve results for.
Select which locales, currencies and country groups you wish to include. Once ready, click the Download template button. Click the Include rows for missing data tickbox if you wish to include a row for a product in your template file, even if previously pricing has not been set for this product.
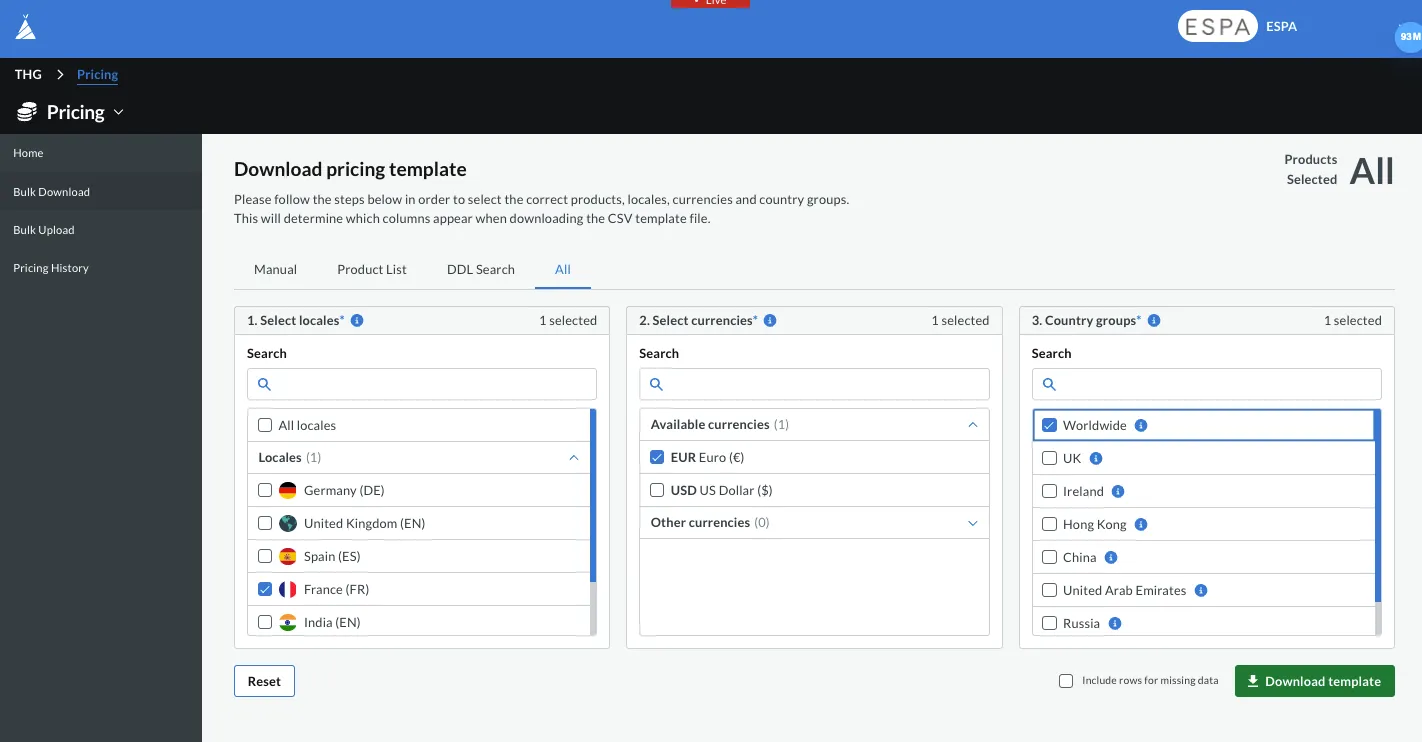
All
This tab is to be used to view or change pricing for all products for a given set of locales, currencies and country groups.
Select which locales, currencies and country groups you wish to include. Once ready, click the Download template button. Click the Include rows for missing data tickbox if you wish to include a row for a product in your template file, even if previously pricing has not been set for this product.
Bulk Upload
To change the selling price or RRP for a product, download a file containing all of the relevant products using the Bulk Download submodule. Begin by editing this file locally. Do not edit the column headers.
Edit the selling price via the Price column. Edit the RRP via the RRP column. If you would like the selling price to be the same as the RRP, populate both columns with the same value. See the fallback section of the glossary below for more information on how price fallbacks work.
You may edit the cells within Subsite (i.e. locale), Currency and Country Group columns to apply pricing to the entered values.
The Expiry Date and Campaign Details columns are just used as notes and reference points for you and your team, they do not have any automatic implications in the system.
Either drag and drop your edited CSV, or click the Browse Files button to select your local file. When ready, click the Upload File button to apply your changes to the system.
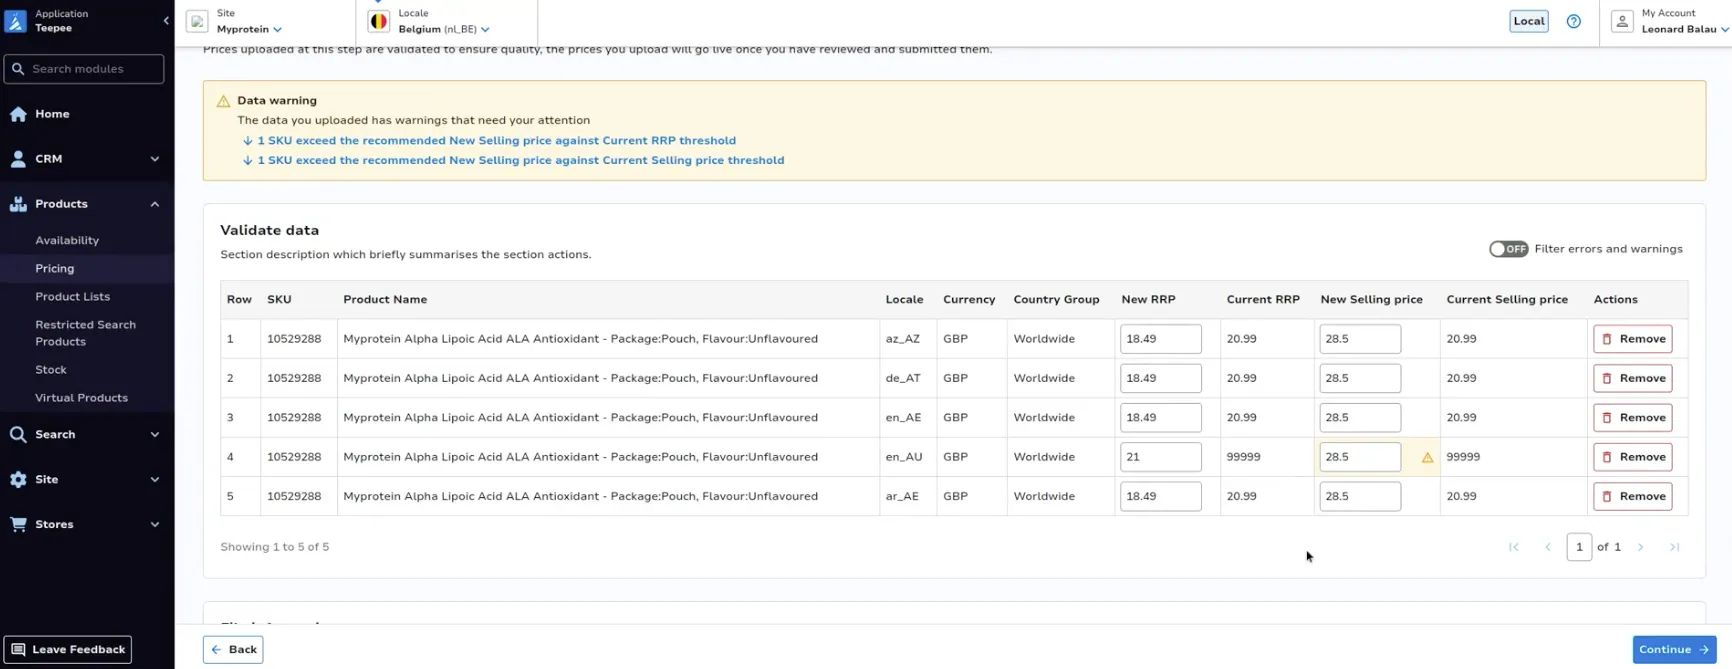
If the percentage a selling price has changed compared to either the currently live selling price, or the currently live RRP, exceeds the threshold for this site, a warning will appear for the corresponding row. Similarly, if the percentage a RRP has changed compared to the existing RRP exceeds the threshold for this site, a warning will appear for the corresponding row. You can either then change the value in your file and reupload, or if you’d like to proceed and ignore the warning, continue with the current upload.
Campaigns
Price campaigns are temporary price changes which override the permanent pricing set within the above submodules (bulk upload). The changes can be scheduled ahead of time and always have a start and end date specified.
The selling price and RRPs can be changed as part of a price campaign.
Live
This tab is to be used to view any campaigns currently live, meaning the prices in these campaigns will reflect on site.
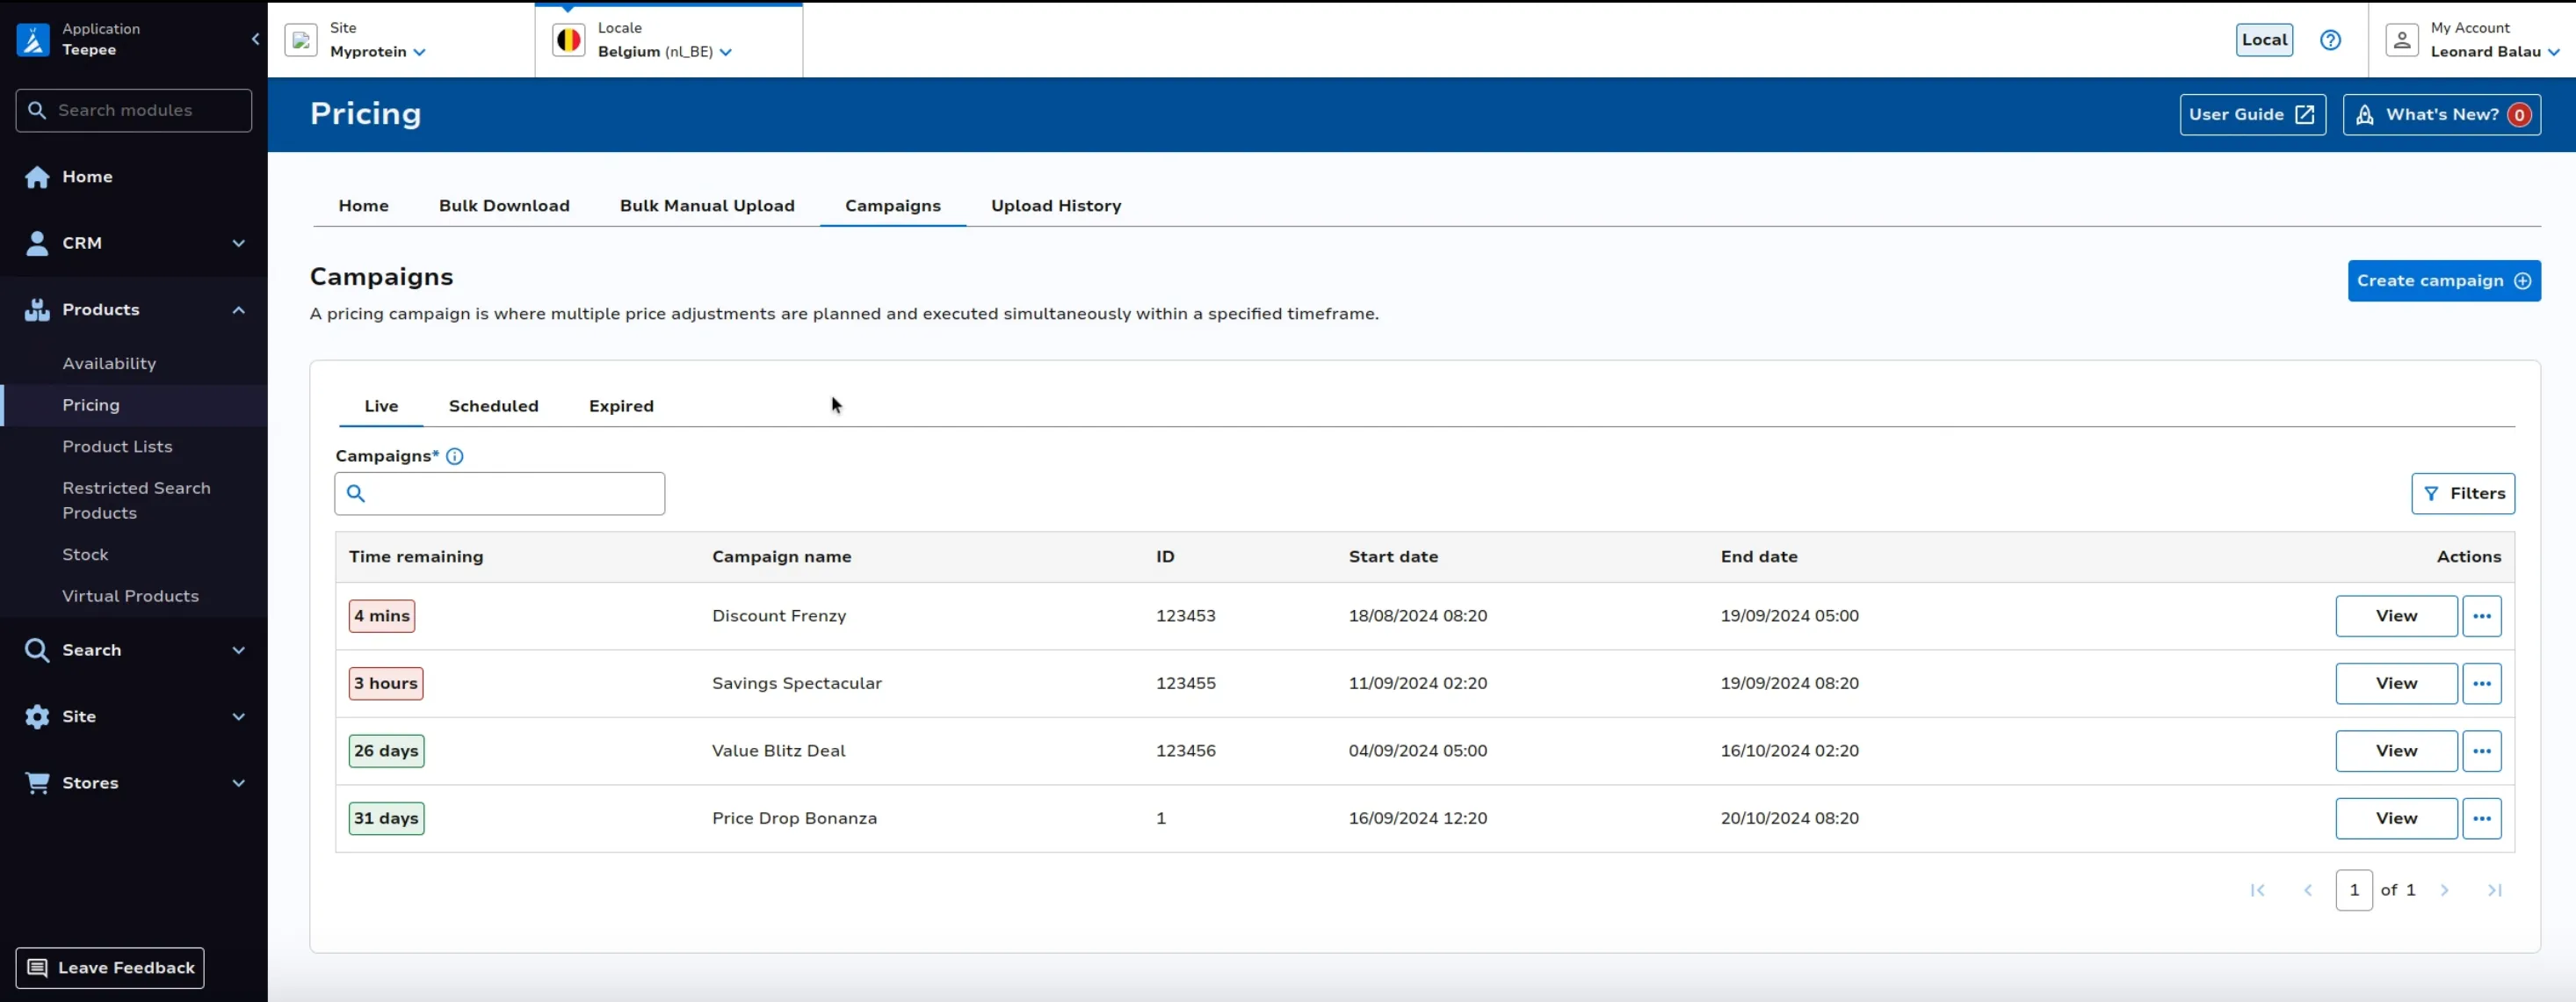
Click View to see more details. Here you’ll be able to download the price changes in CSV format, as well as a history log of changes made to this campaign.
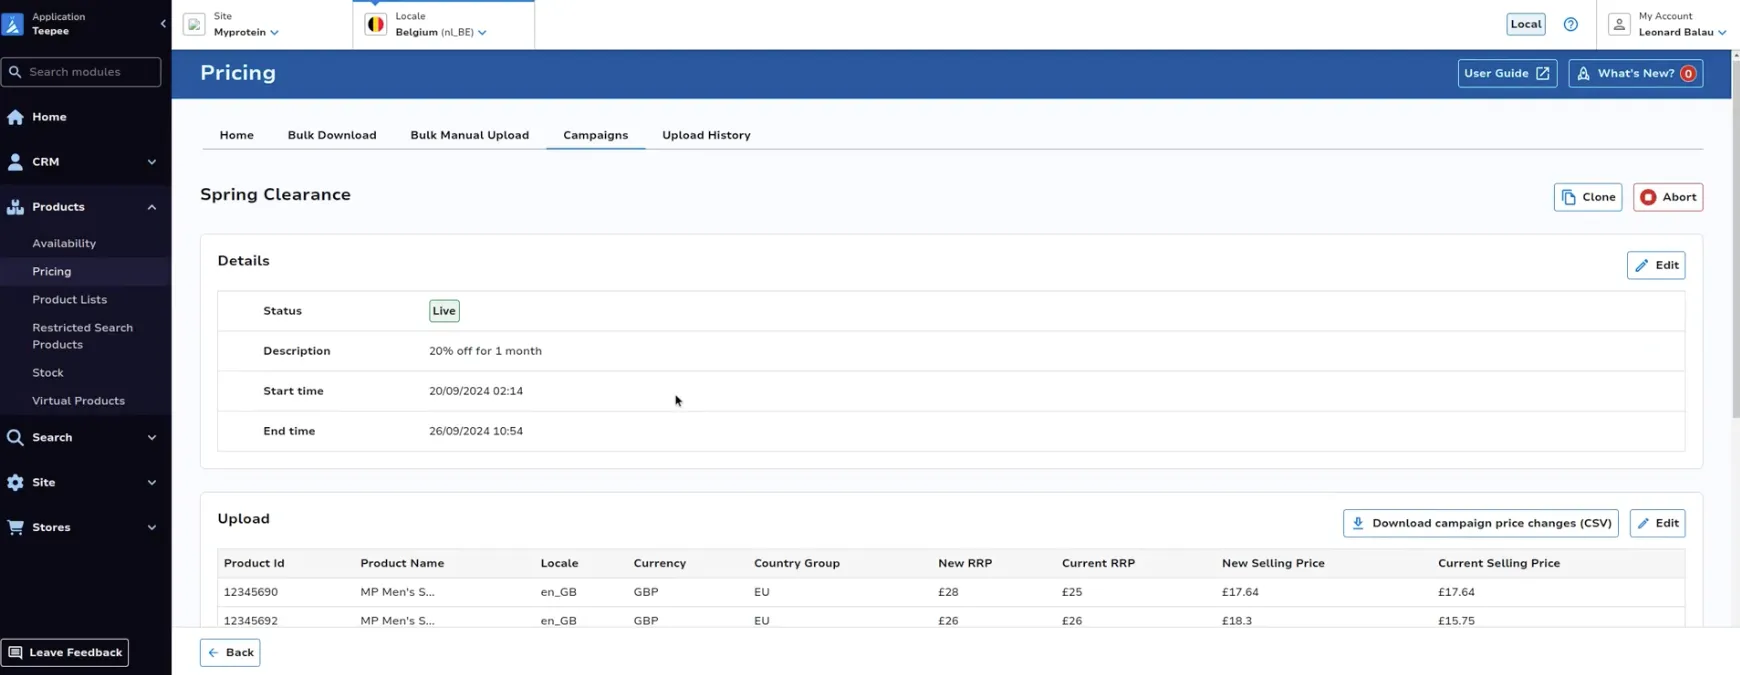
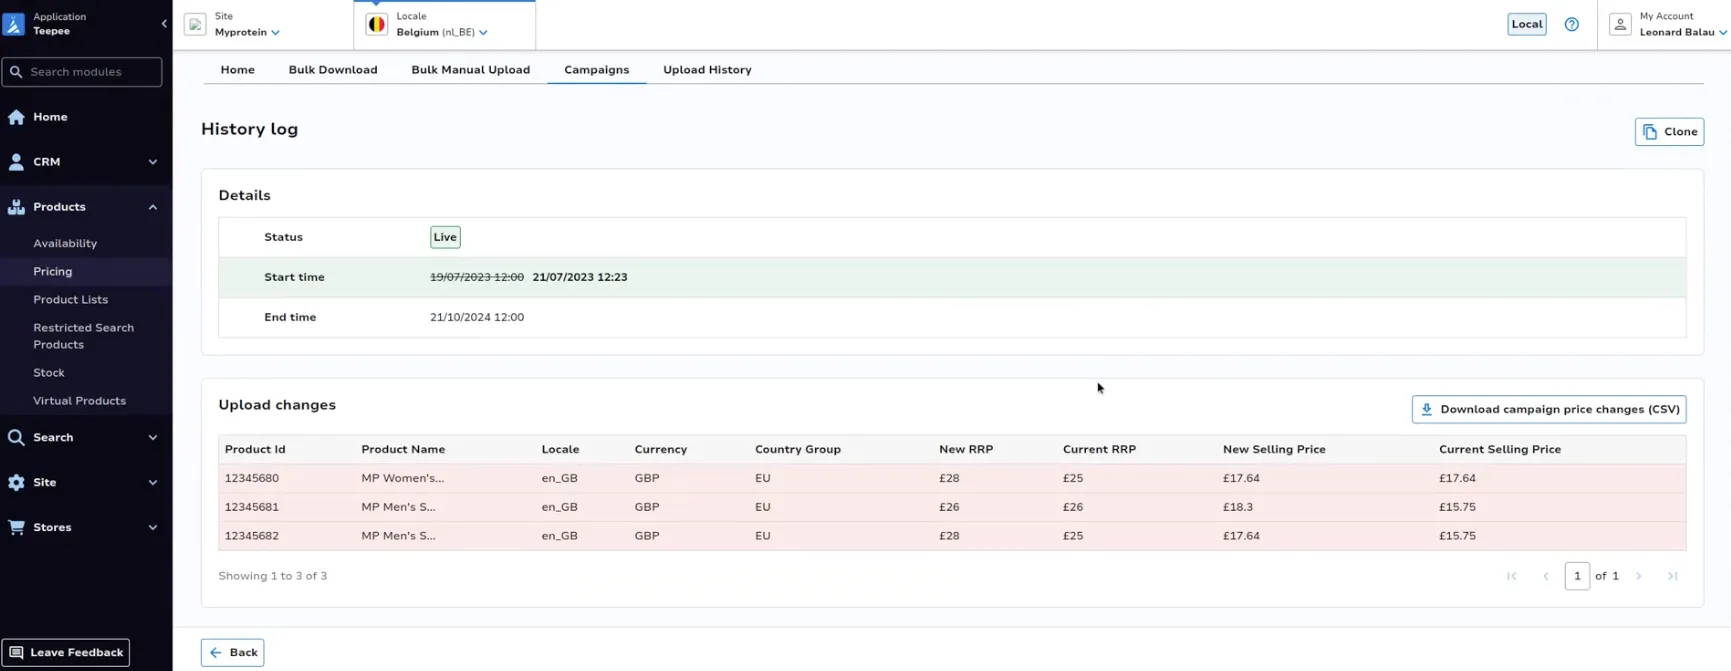
Click Clone campaign to copy this campaign and edit it to create a new campaign.
Click Abort campaign to stop this campaign immediately, returning pricing on site back to the permanent prices as set within Bulk Upload module.
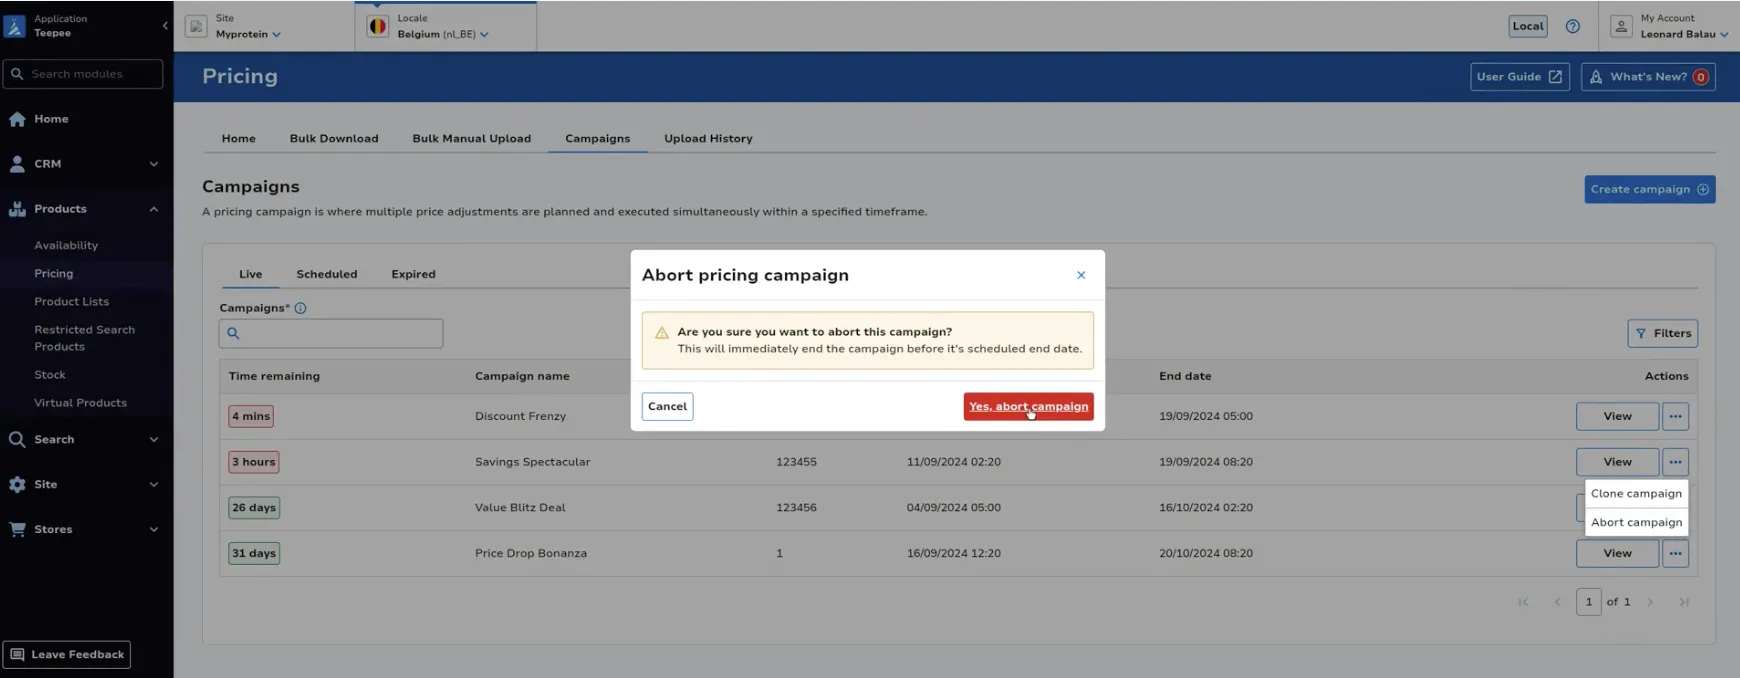
Scheduled
This tab is to be used to view any campaigns currently scheduled to go live, meaning the start date of the campaign is in the future.
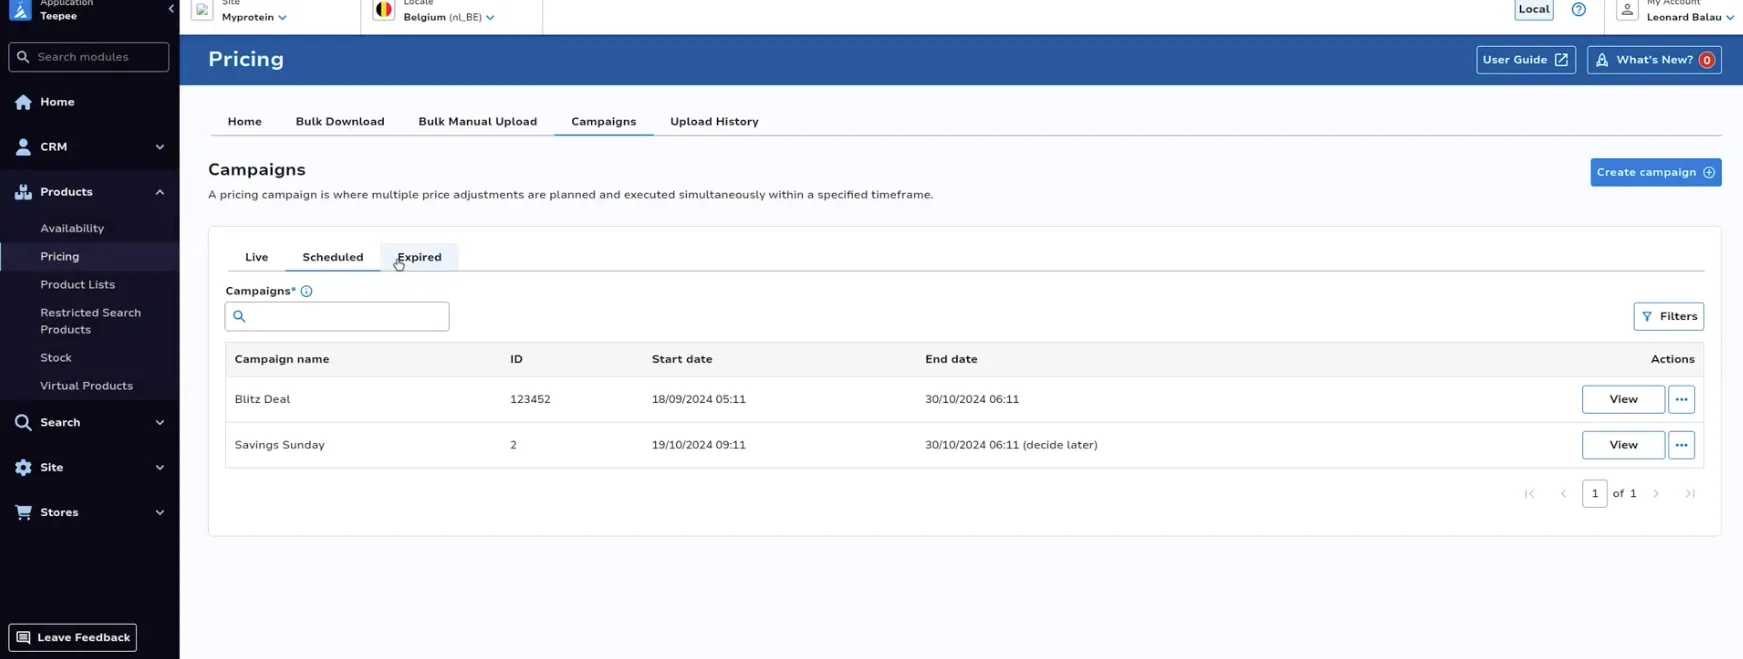
Click View to see more details. Here you’ll be able to download the price changes in CSV format, as well as a history log of changes made to this campaign.
Click Clone campaign to copy this campaign and edit it to create a new campaign.
Expired
This tab is to be used to view any campaigns which were previously live but have now finished, meaning the campaign end date is in the past.
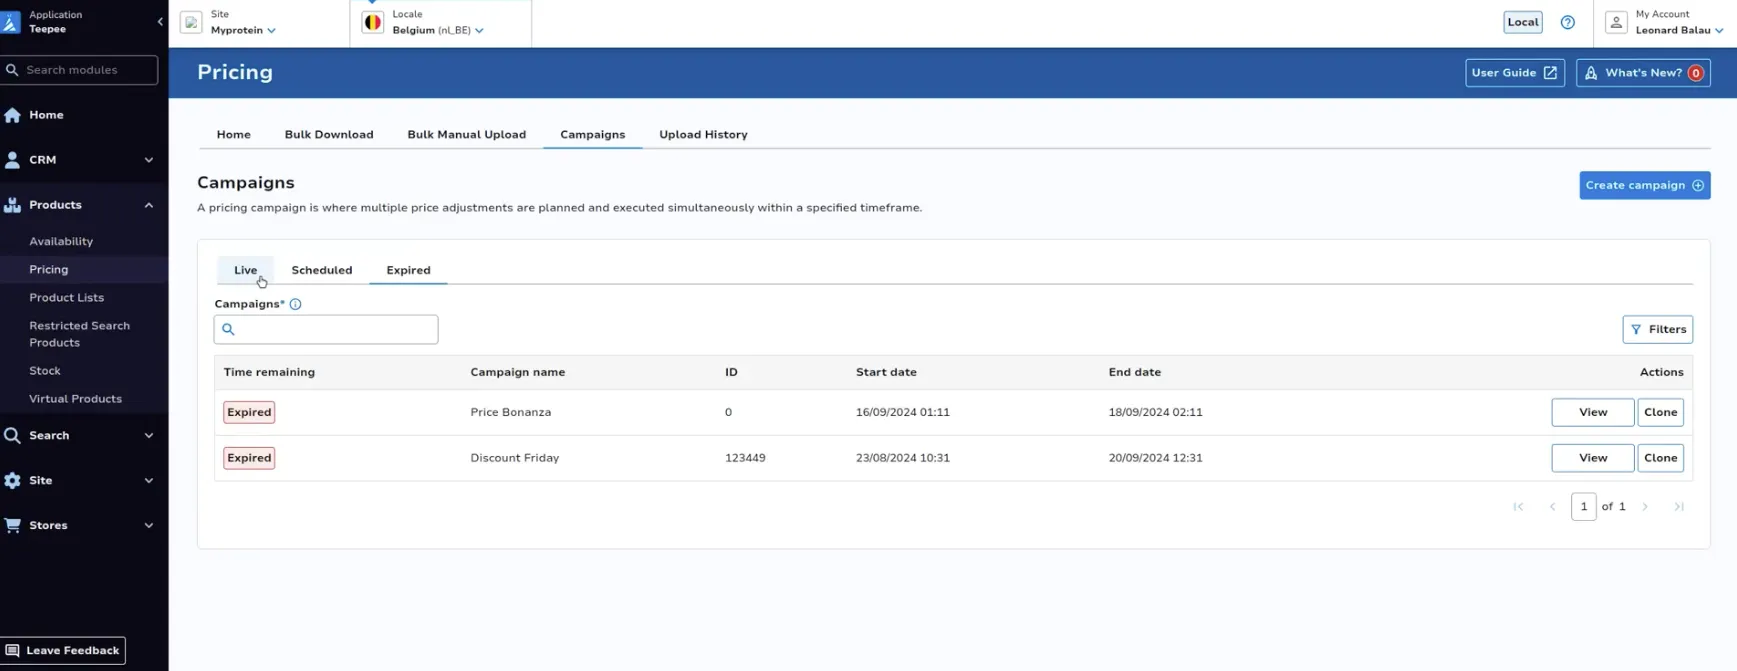
Click View to see more details. Here you’ll be able to download the price changes in CSV format, as well as a history log of changes made to this campaign.
Click Clone campaign to copy this campaign and edit it to create a new campaign.
Create Campaign
Click Create campaign on the landing page.
Specify your campaign name and description.
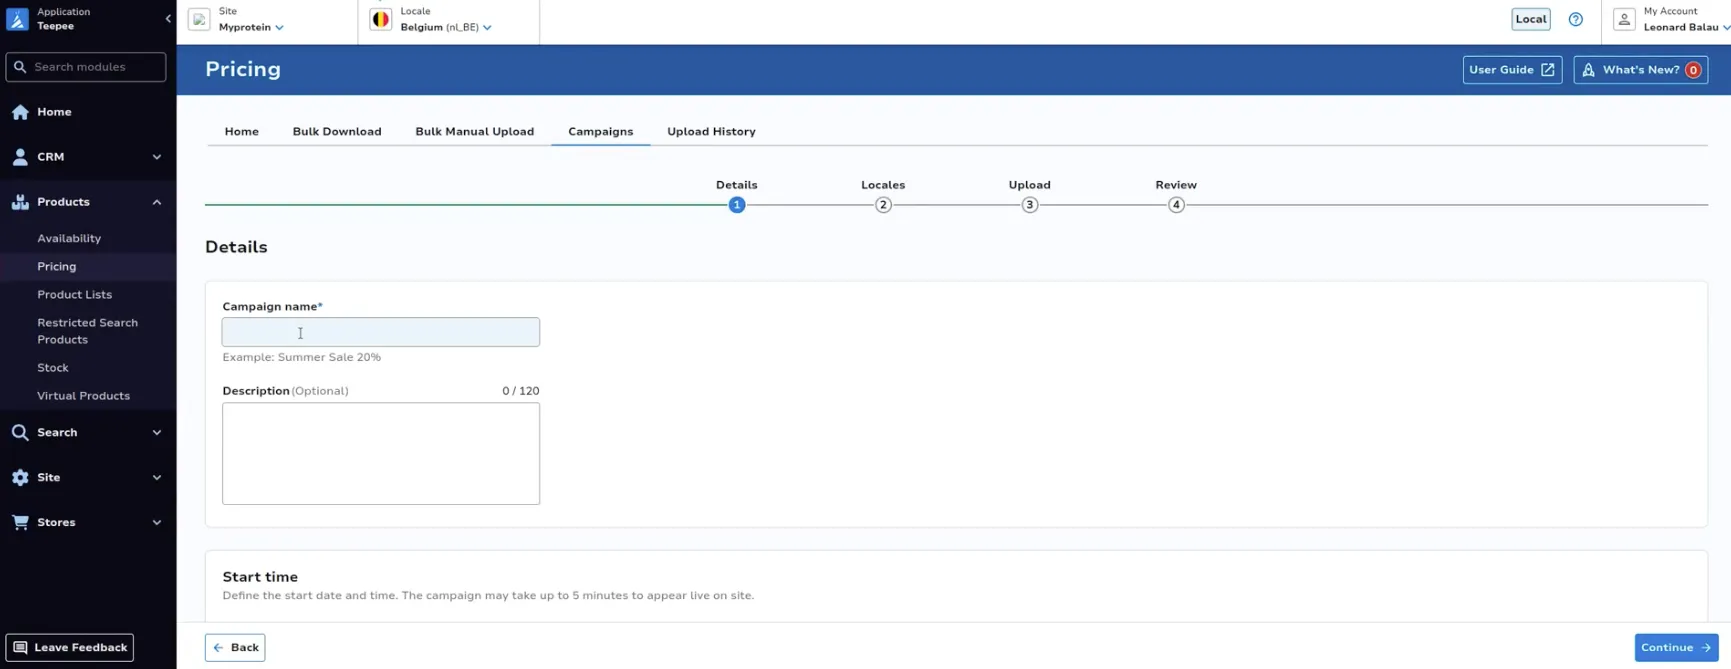
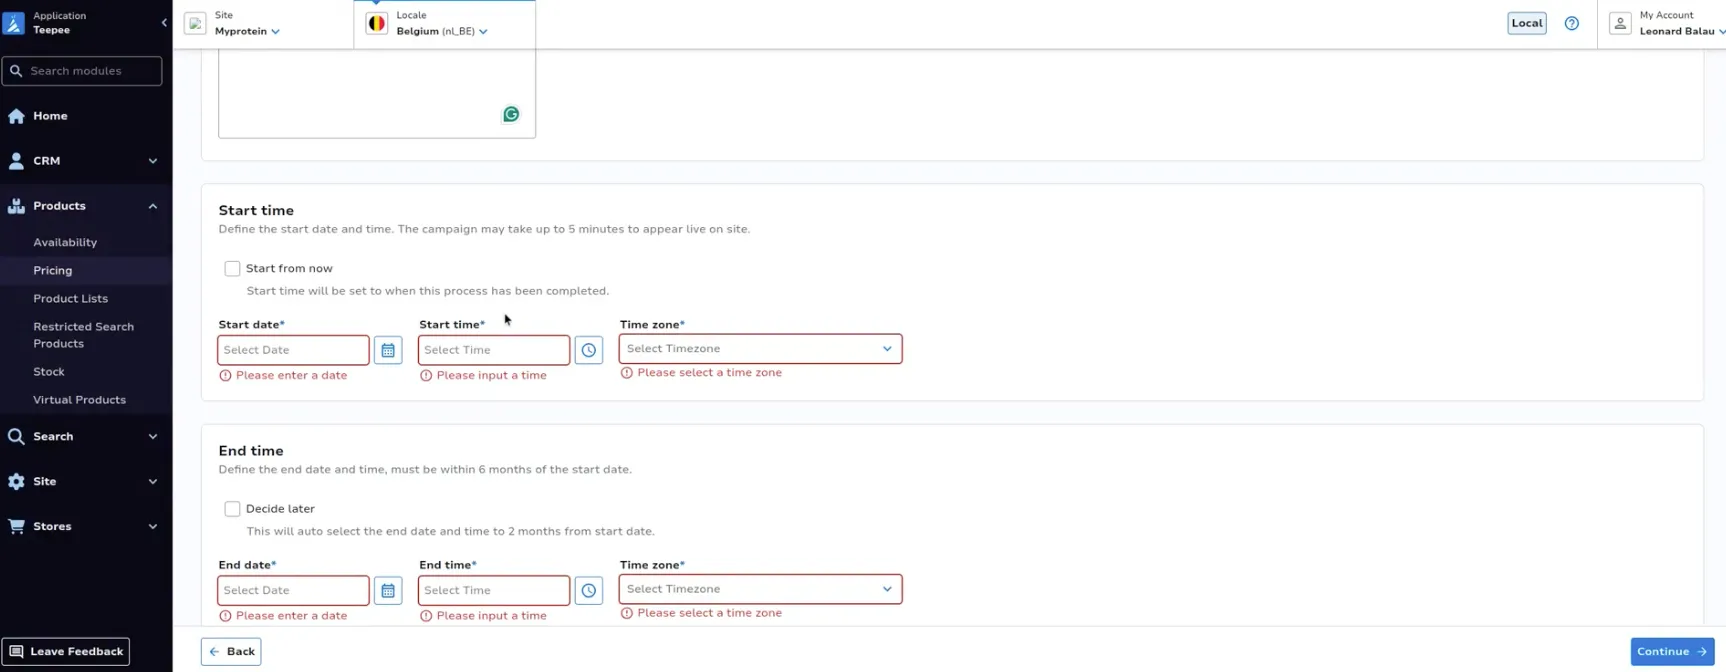
The start time is the date and time you wish for these temporary prices to go live on site. The end date is the date and time you wish prices to return to the permanent prices set within Bulk Upload module.
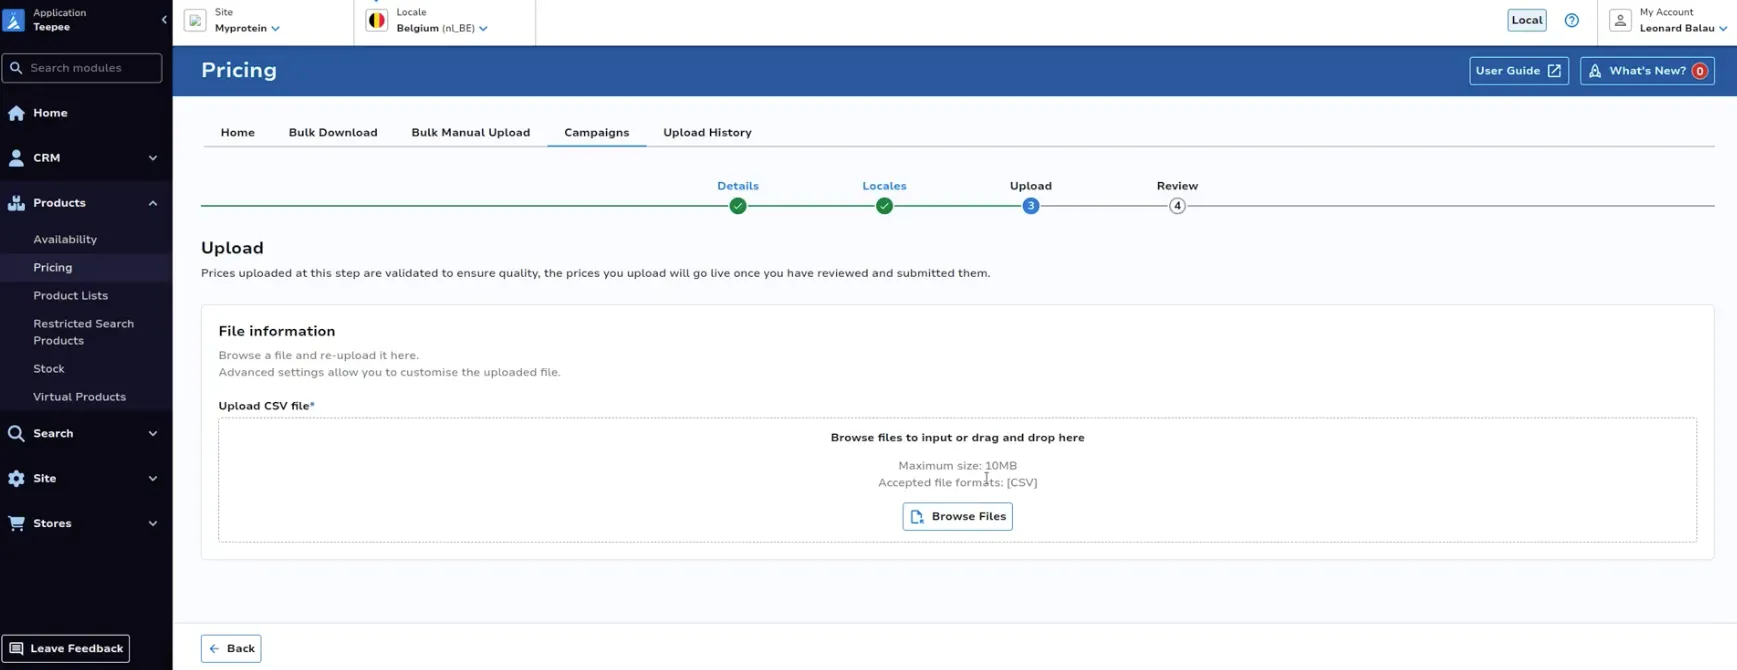
Upload a file; the file must be the same format as those used within Bulk Upload module. You can download prices to edit using the Bulk Download tab.
You can preview your changes and edit the new RRPs and selling prices within the tool. You can filter this page to only show rows which have errors or warnings using the toggle at the top right.
Review your campaign before confirming your changes.
Edit Campaign
When viewing either a live or scheduled campaign, click View on the campaign you wish to edit.
From this view, you can edit sections of the campaign, such as campaign details and upload file.
Pricing History
View price change upload files which have been uploaded for the specified site within the past 30 days. Click the Download CSV button within the actions column to download the referenced file.
To filter results based on a particular SKU, use the search bar. Click the dropdown within the Filename column to see which selling price and RRP were uploaded for the SKU in that file.
Configure Currencies
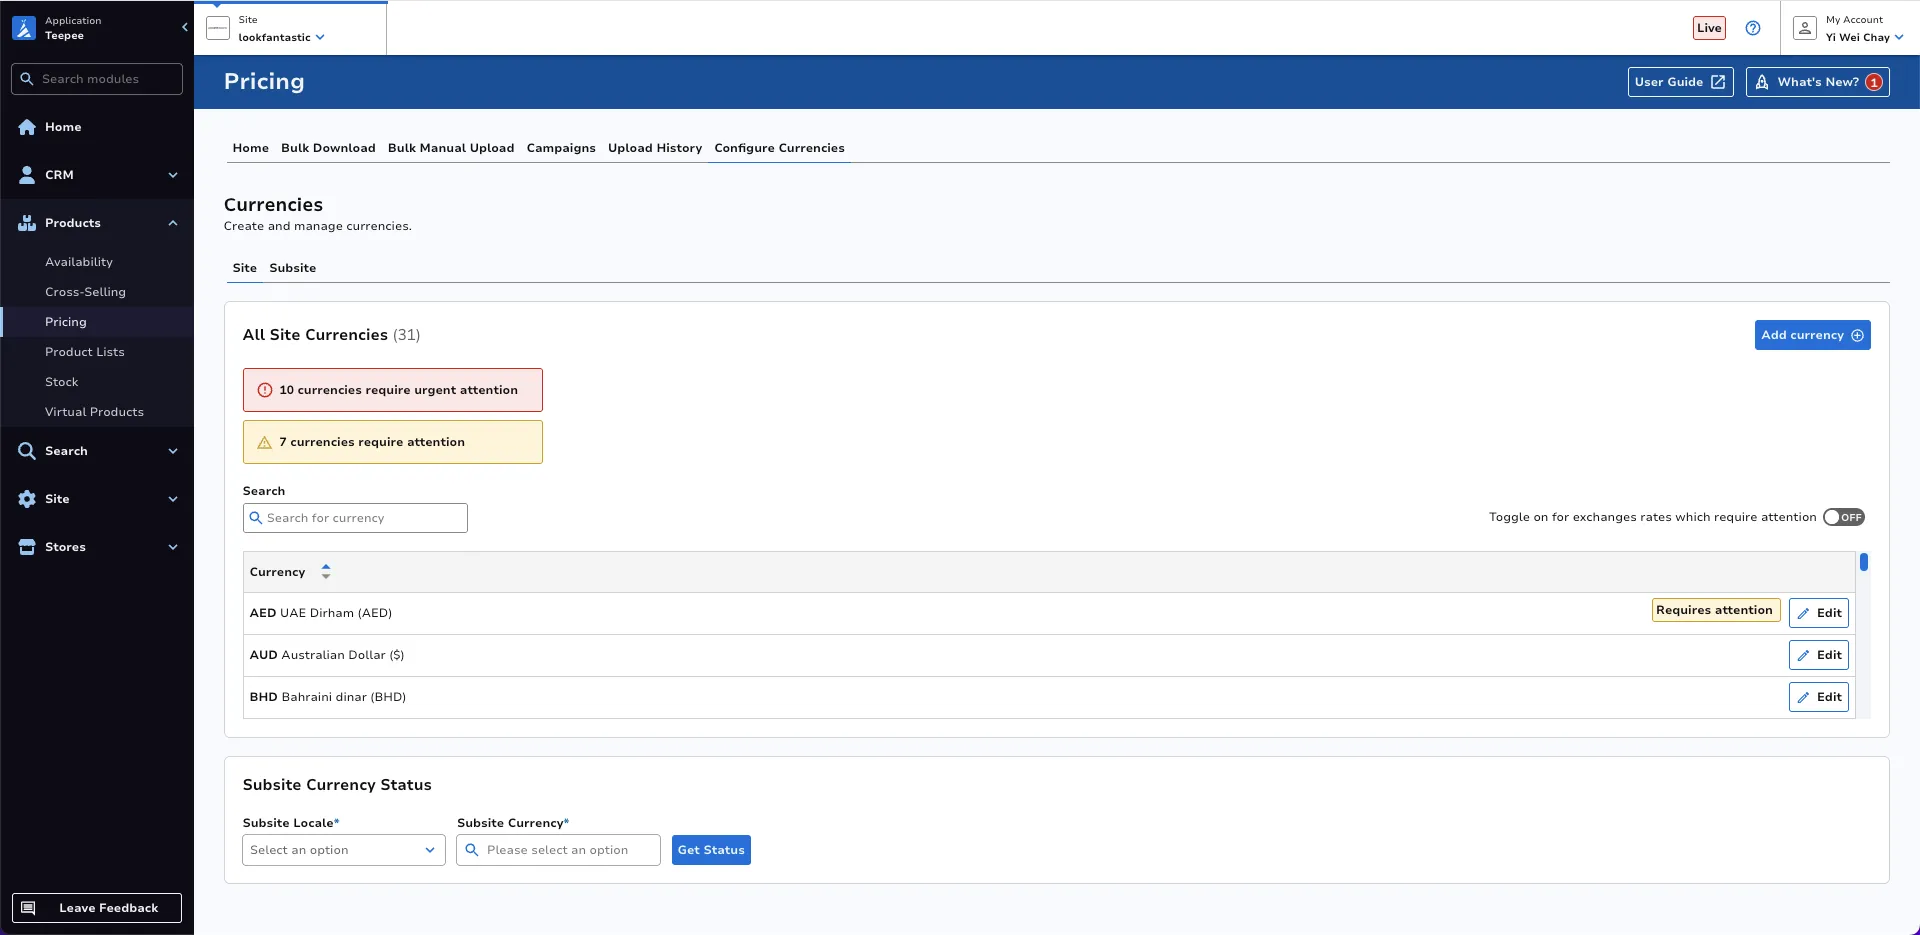
The Configure Currencies section provides an overview of the currencies assigned to the site and its respective subsites. Users can manage currency exchange rates at the site level by adding or editing them as needed. Additionally, users can monitor the currency statuses of subsites and make adjustments by adding or modifying currencies at the subsite level.
Site
This tab is to be used to view all currencies and default currencies that are assigned to the site. In addition to this, it is also used to view Subsite Currency Status.
The yellow and red warning tags below the All Site Currencies subtitle shows the number of currencies that require attention and the number of currencies that require urgent attention respectively.
- Currencies requiring attention (Yellow Tag): These are currencies where the exchange rate displayed on the site differs from the live exchange rate by 5% to 10%.
- Currencies requiring urgent attention (Red Tag): These are currencies where the exchange rate displayed on the site differs from the live exchange rate by more than 10%.
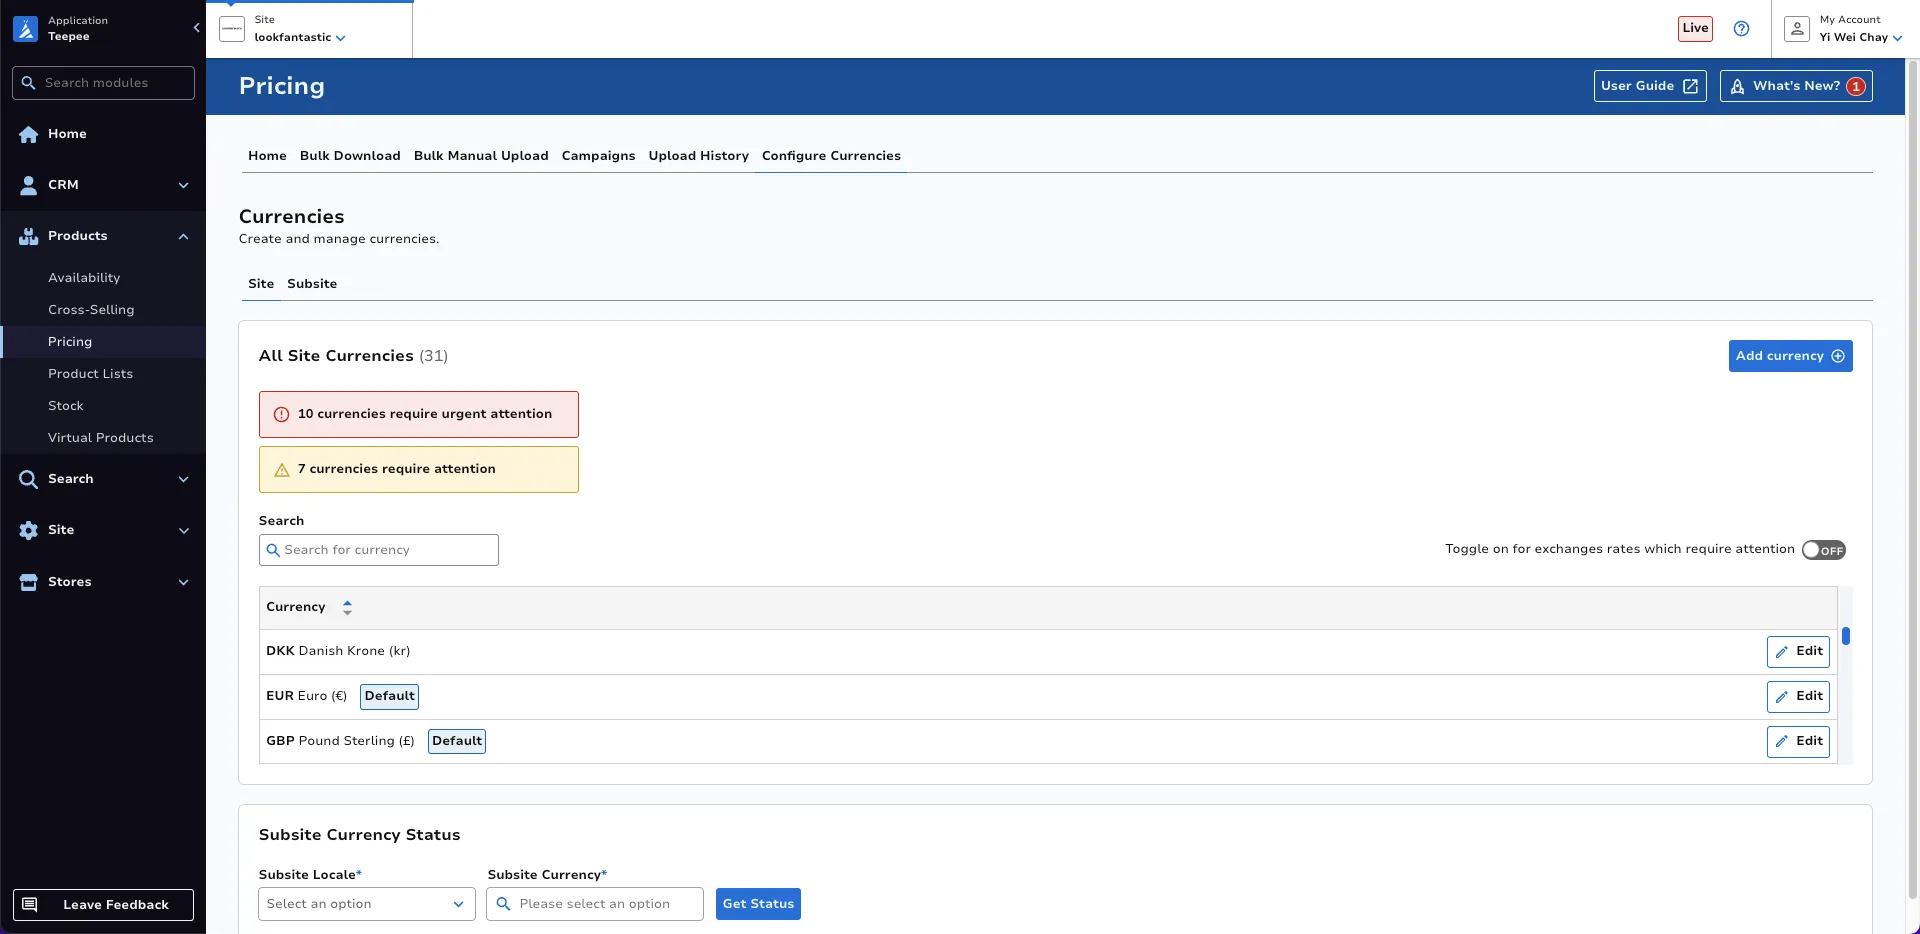
Default currencies will have a Default label beside the currency as shown in the figure below.
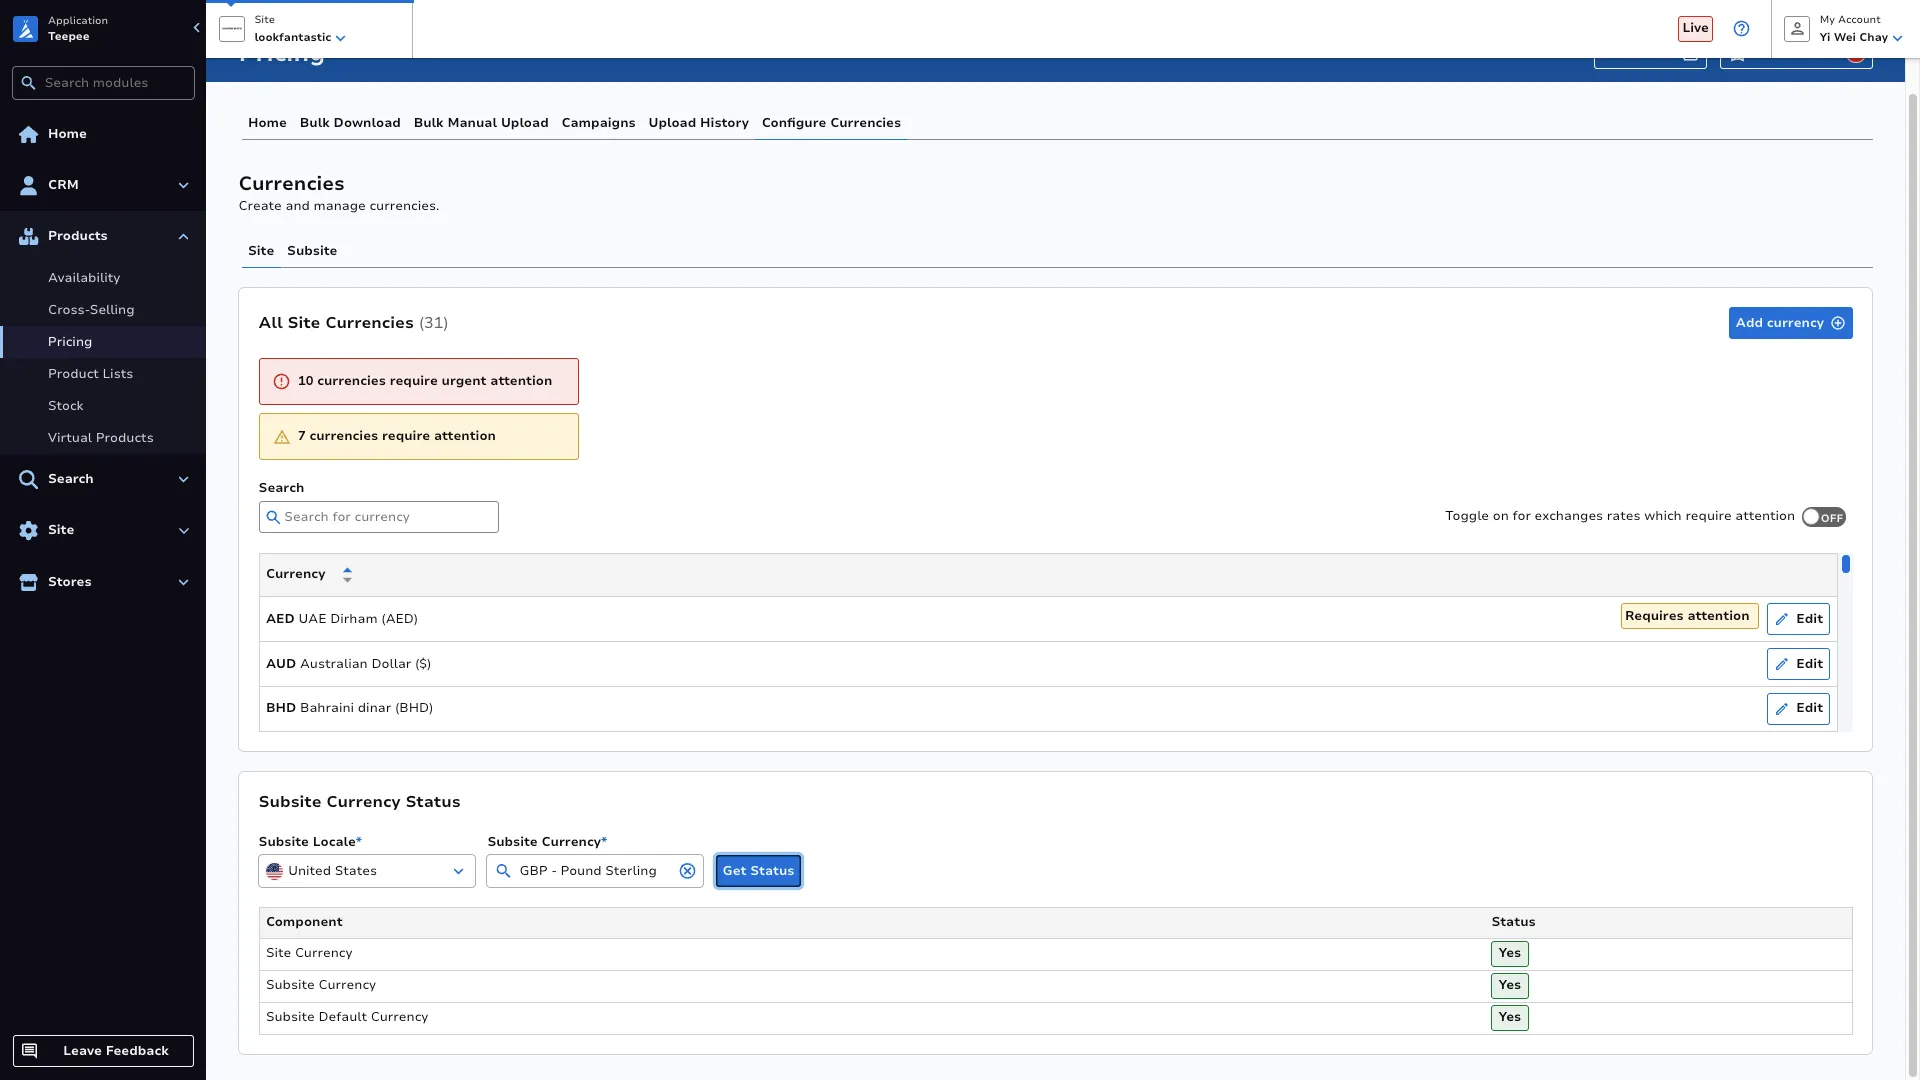
At the bottom of the landing page is the Subsite Currency Status table. This allows the user to get the status of a currency on a subsite.
Site Currencydetermines if a currency is assigned to the site.Subsite Currencydetermines if a currency is ready for use on a subsite.Subsite Default Currencydetermines if the currency is a default currency on a subsite.
Subsite
This tab is to be used to view all enabled currencies for the subsite.
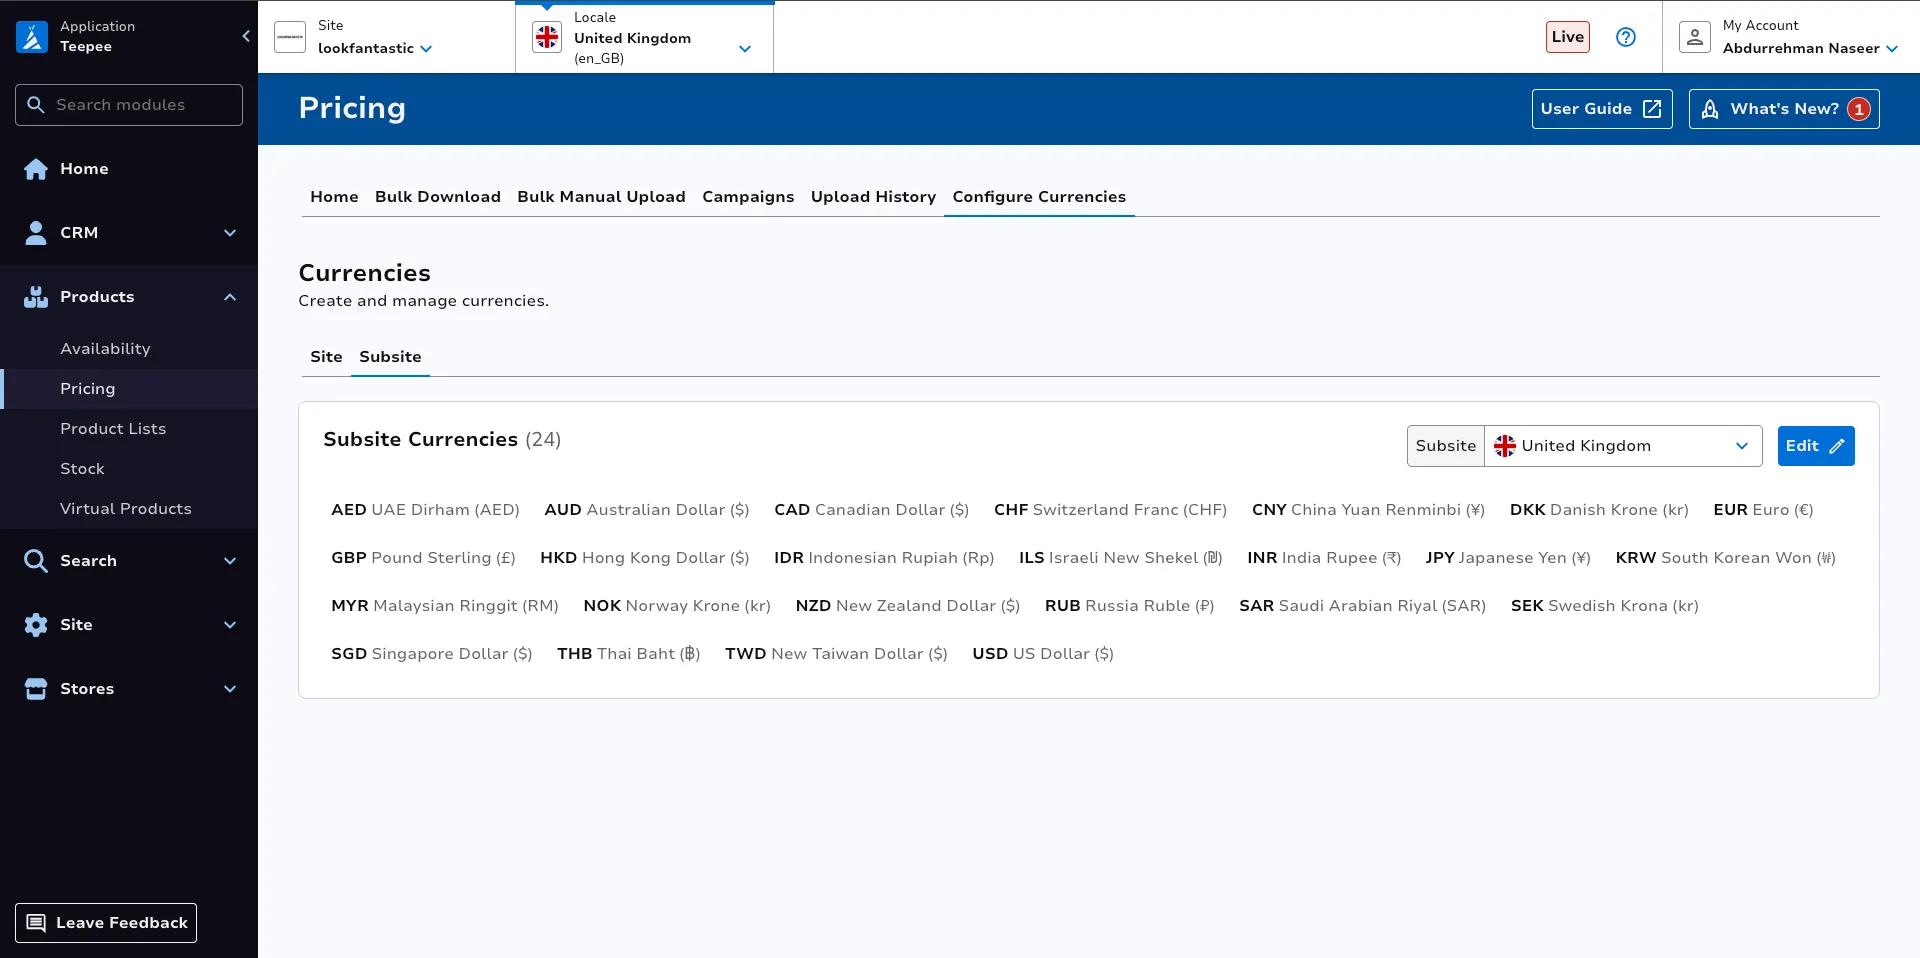
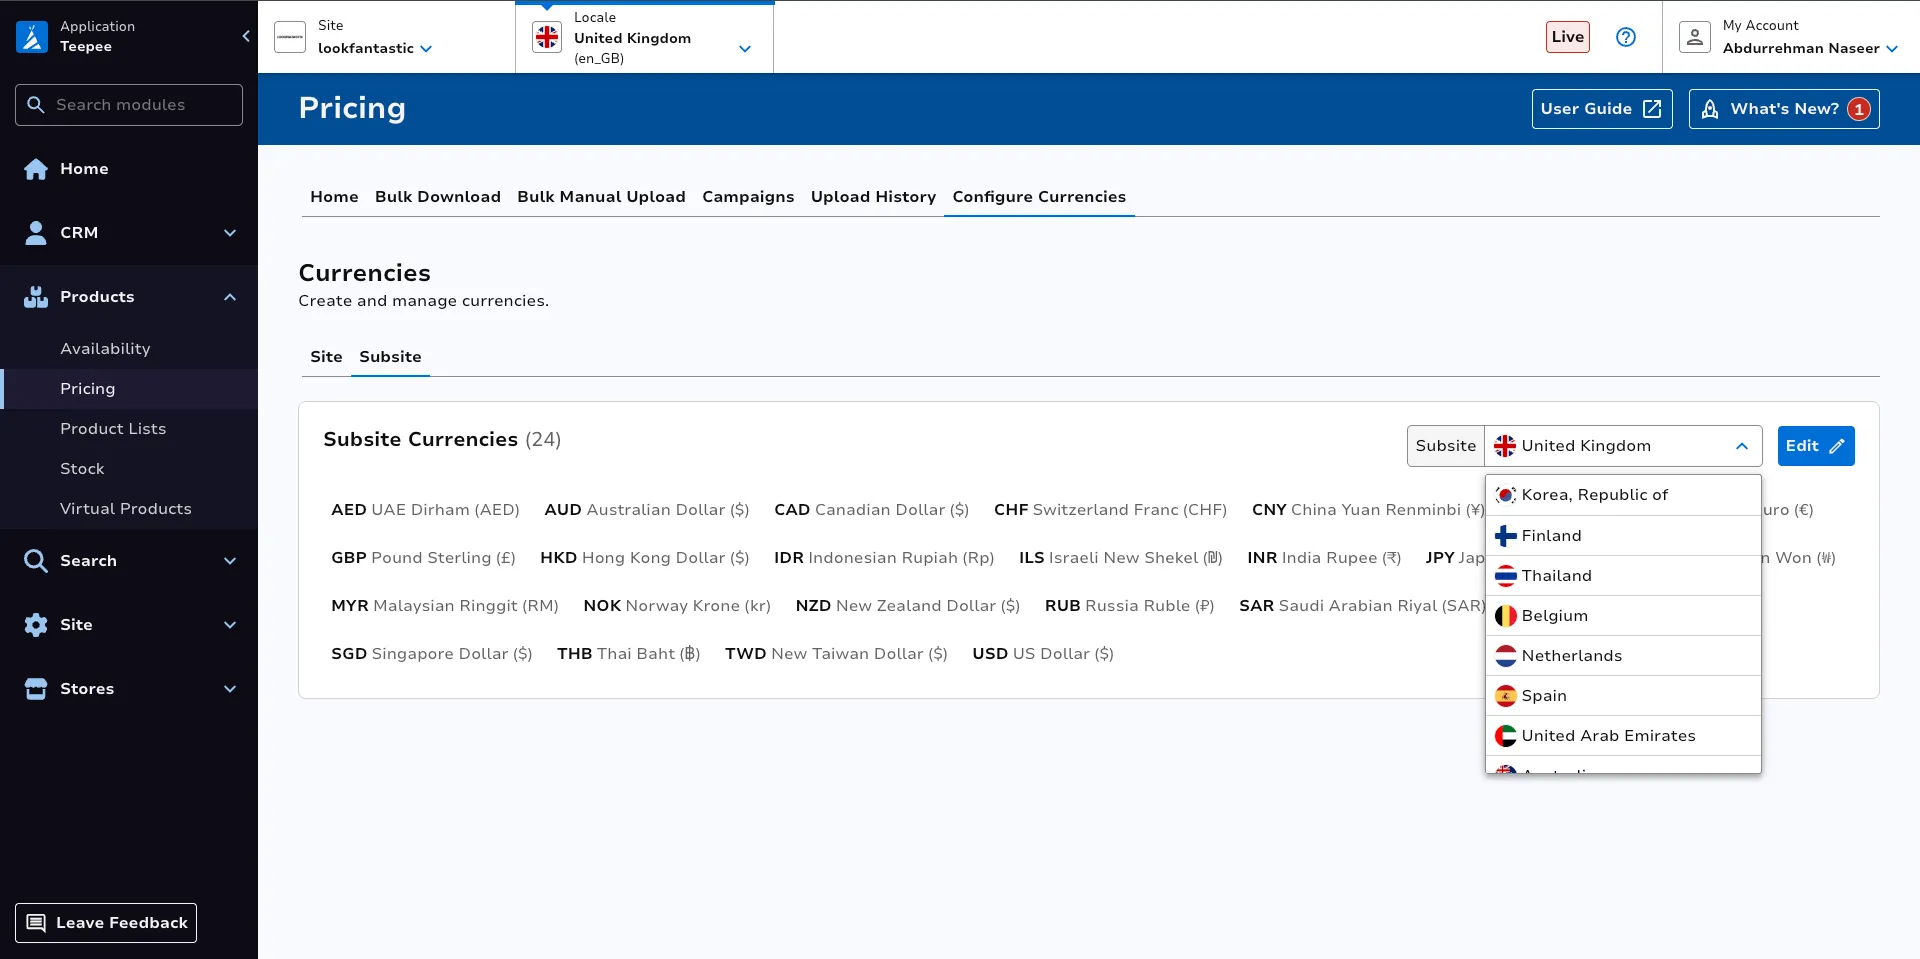
Subsite can be changed by selecting a different option from the dropdown list.
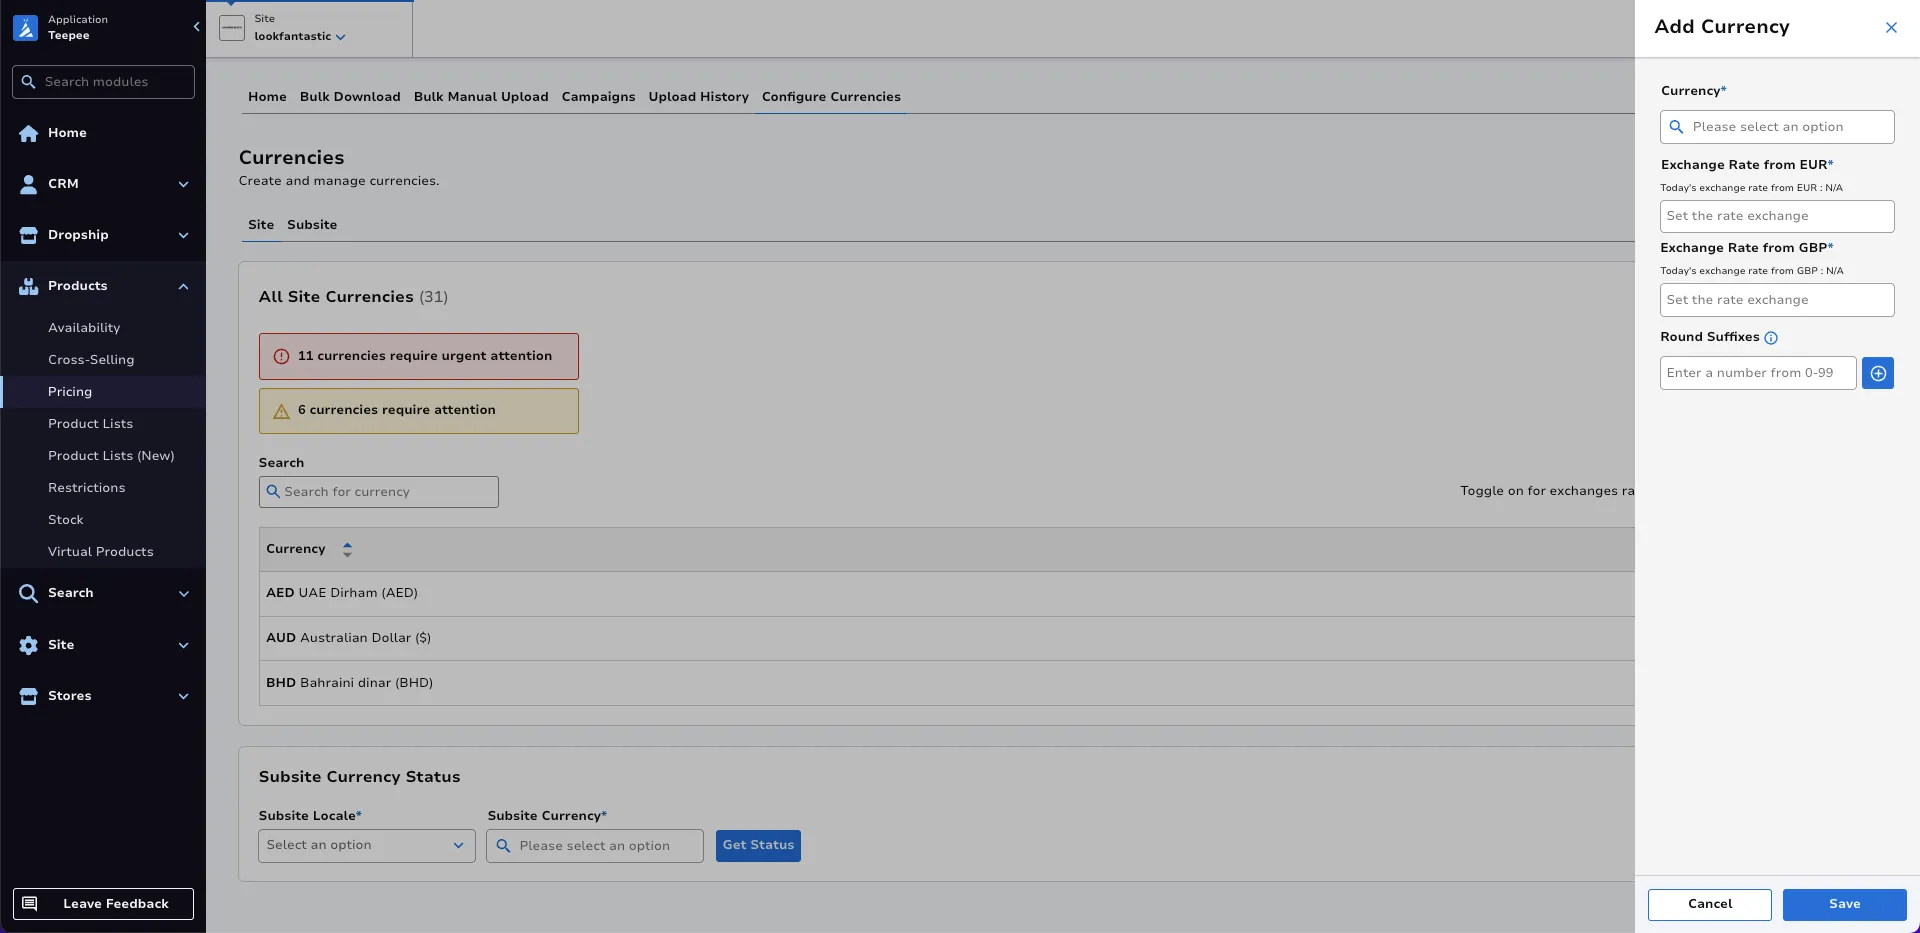
Add Currency
To assign a new currency to the site, click Add Currency on the landing page.
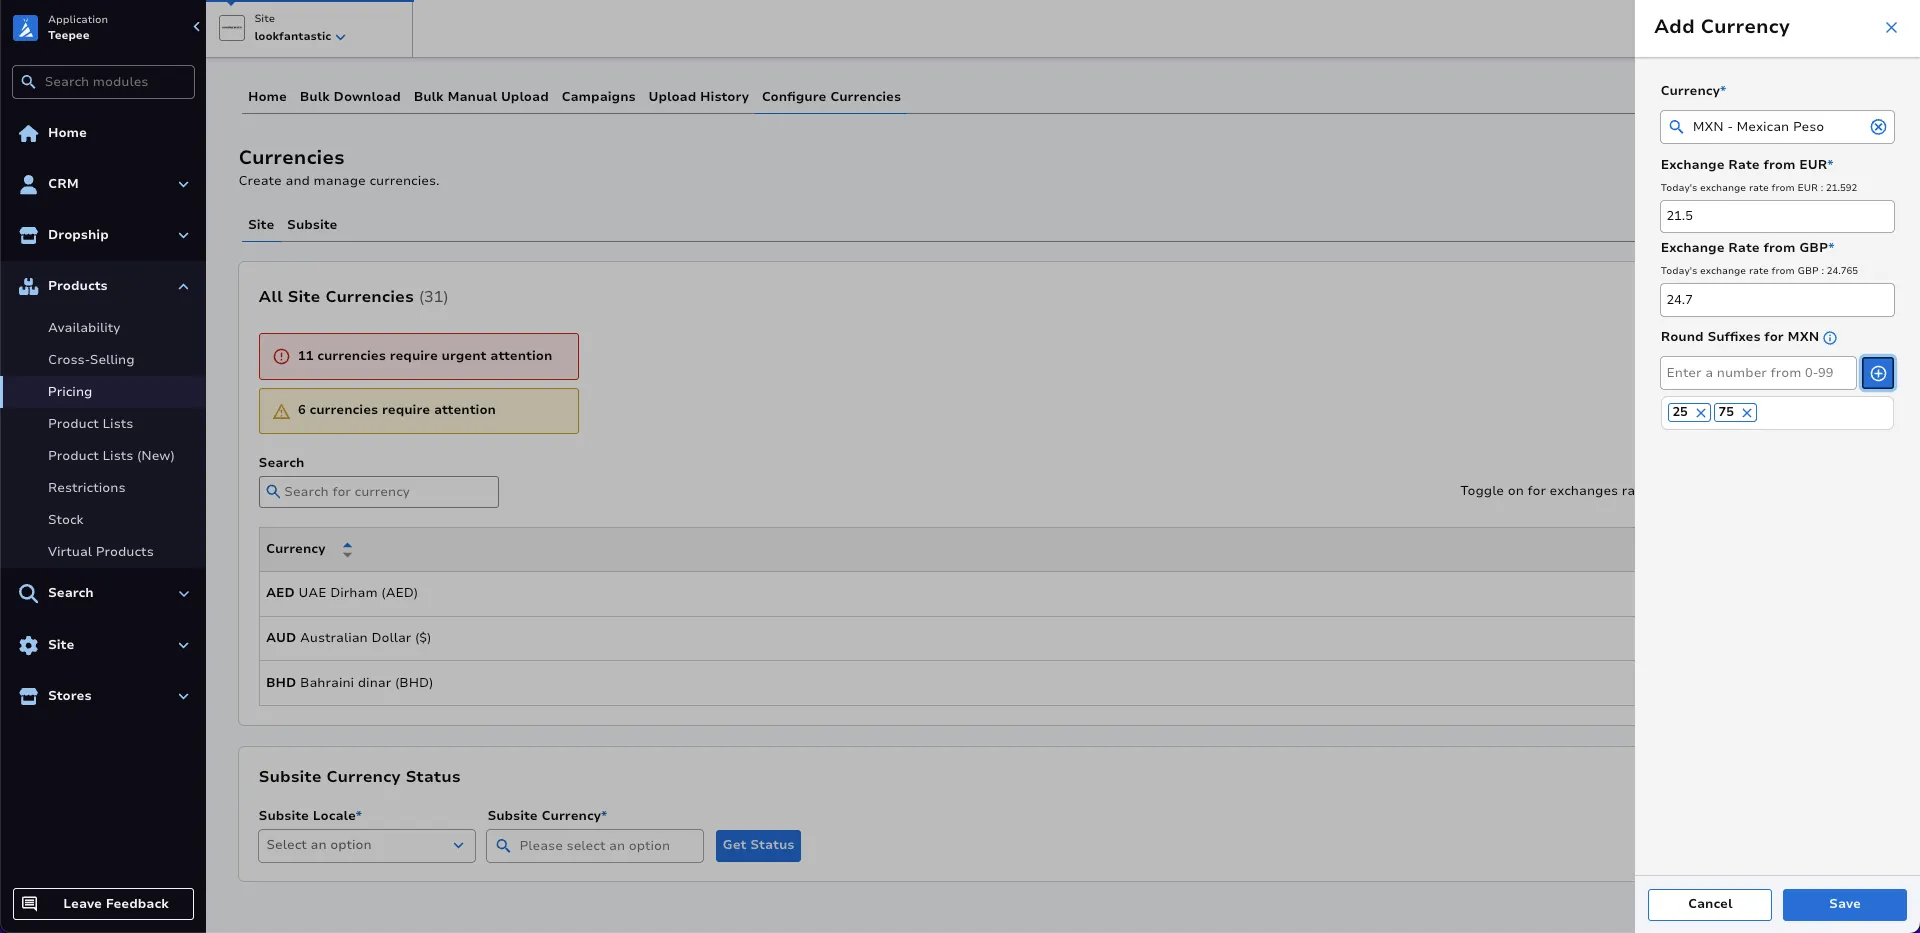
Once a desired currency is selected from the dropdown, the corresponding live exchange rates will be displayed. You can then enter the desired site exchange rates against the default currencies.
In this example:
- Desired site exchange rates: 1 EUR = 21.5 MXN and 1 GBP = 24.7 MXN.
- Live exchange rates: 1 EUR = 21.592 MXN and 1 GBP = 24.765 MXN.
Additionally, you can also choose to set a list of optional round suffixes for the currency. If no round suffixes are set, prices onsite will not be rounded. With round suffixes set, prices onsite will be rounded to the nearest desired decimal value when switching from one country group to another.
In this example, the round suffix is set to [25,75].
- A price of 10.10 MXN will be rounded to 10.25 MXN when displayed on site.
- A price of 10.80 MXN will be rounded to 10.75 MXN when displayed on site.
To add round suffixes, input the desired value in the text box and press enter or the + icon to add it to the list. To remove a round suffix, click the x beside the value.
Edit Site Currency Exchange Rates
The current exchange rates for a currency against the default currencies can only be viewed by clicking the Edit Button.
Click Edit on the currency whose exchange rates you wish to change. In this case, AED will be selected.
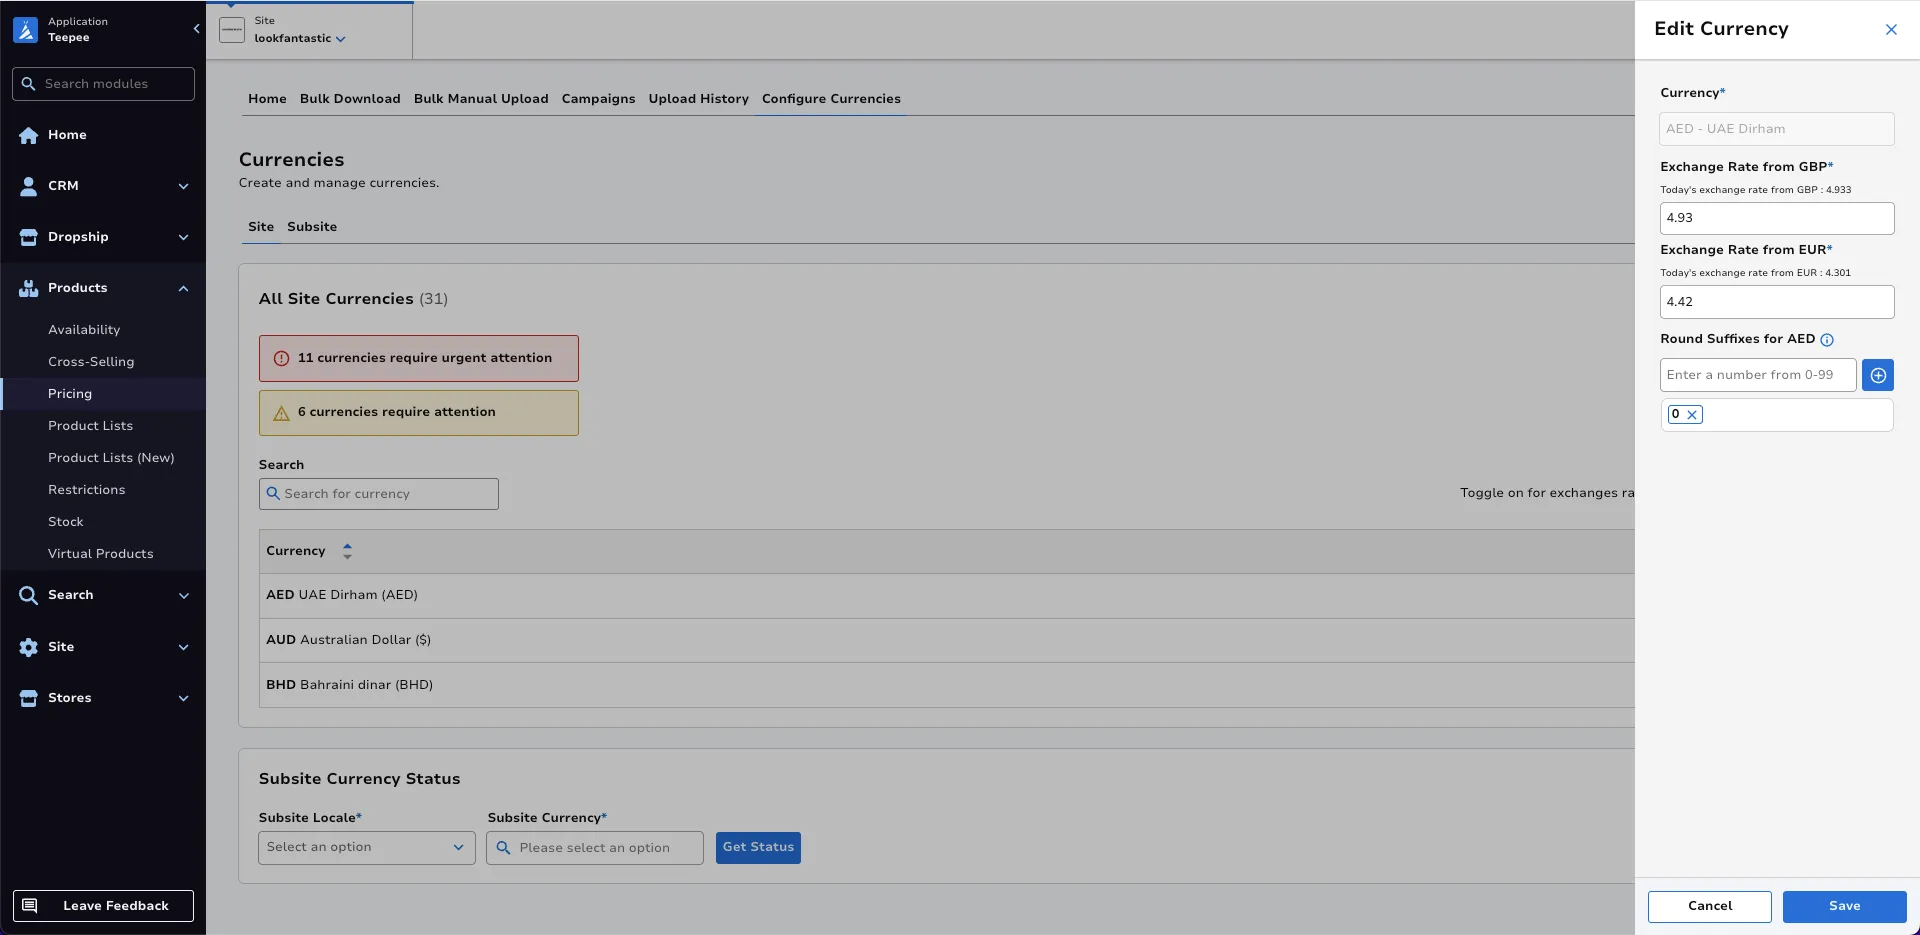
Input the new exchange rates and round suffixes you want. In this case, exchange rate against GBP will be changed from 4.93 to 4.8. Another round suffix 50 will be added to the existing list of round suffixes.
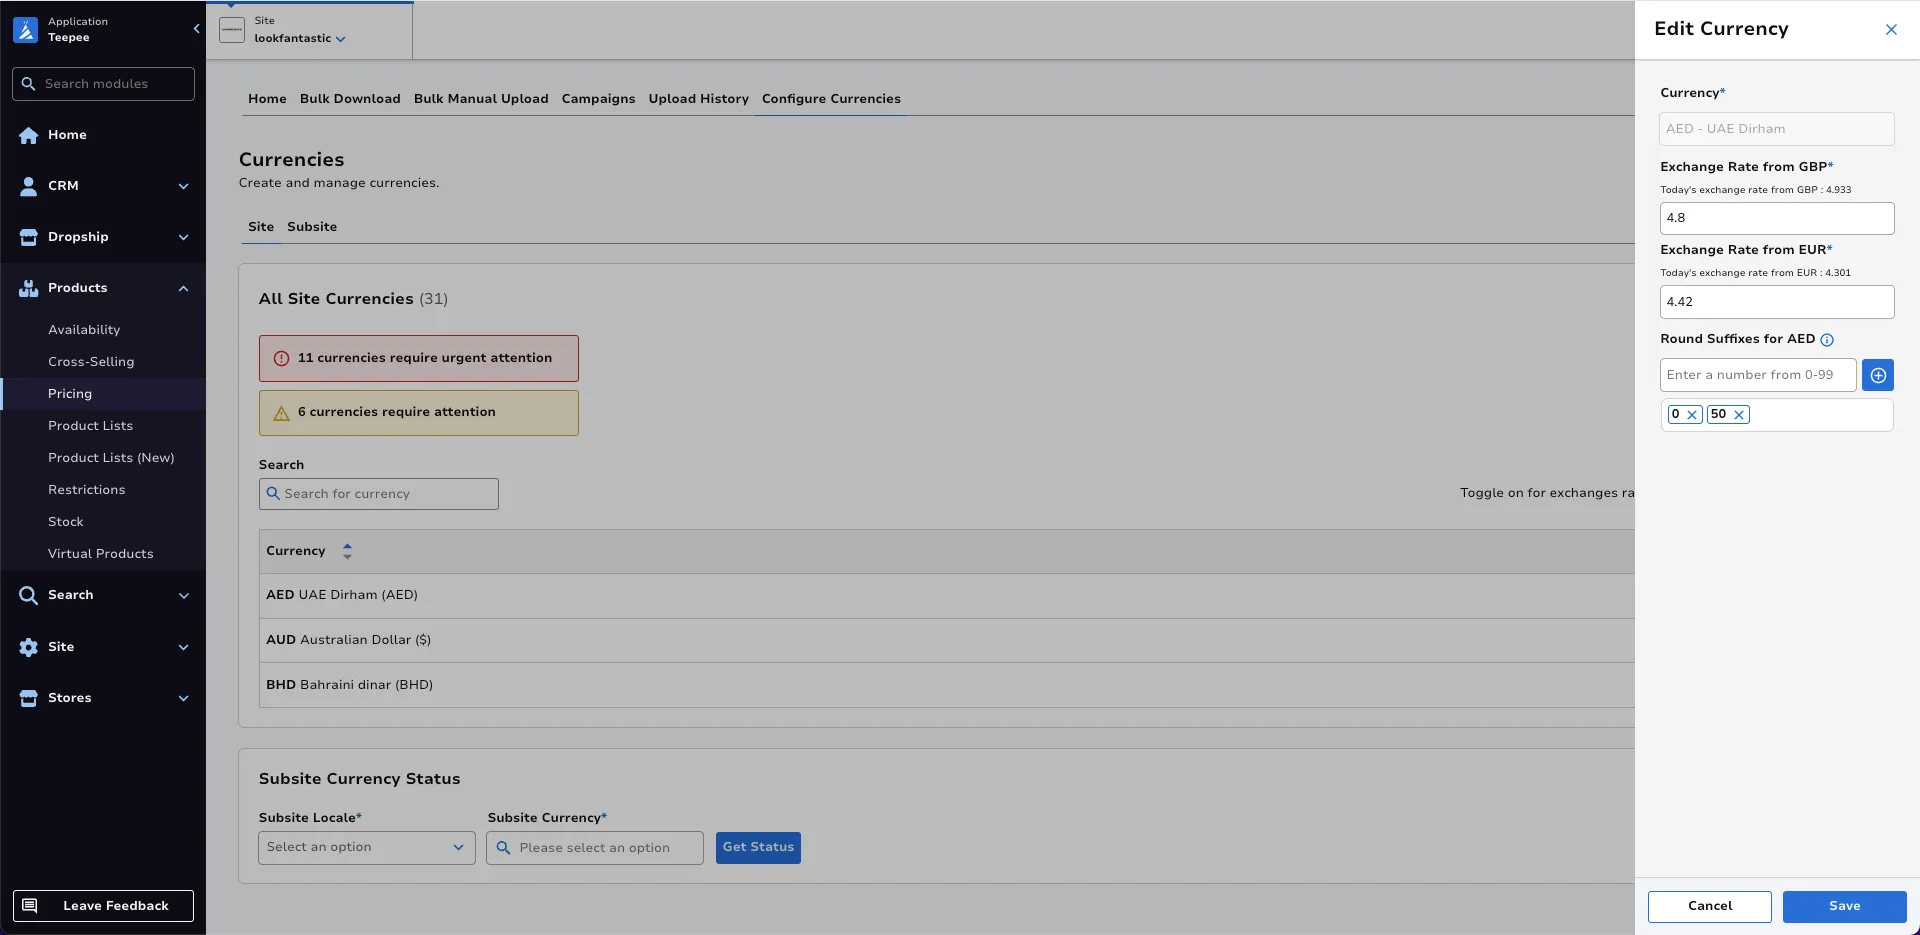
In the scenario shown, the new exchange rates will be: 1 GBP = 4.8 AED and 1 EUR = 4.42 AED. The new round suffixes will be [0,50].
Once you are satisfied with the changes, click Save.
Edit Subsite Currencies
On the Subsite tab, click Edit.
All enabled currencies for the subsite will appear as selected.
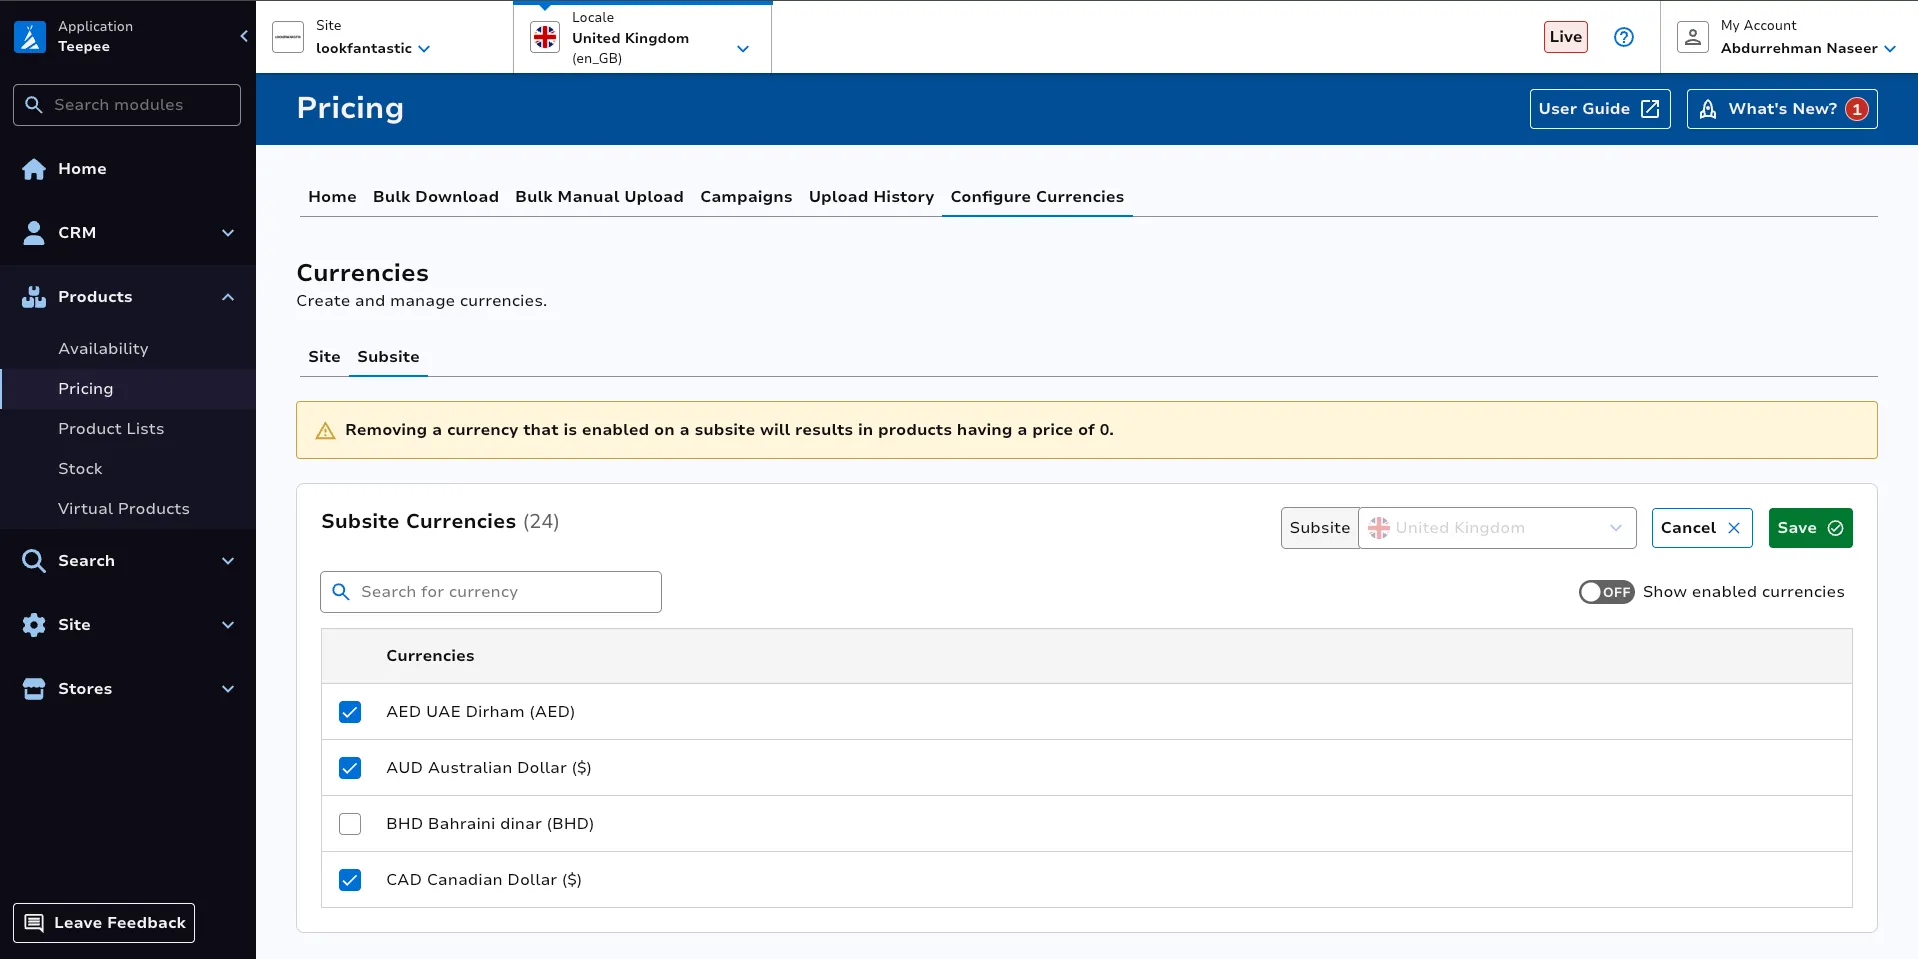
The Show enabled currencies button can be toggled on to display only the enabled currencies.
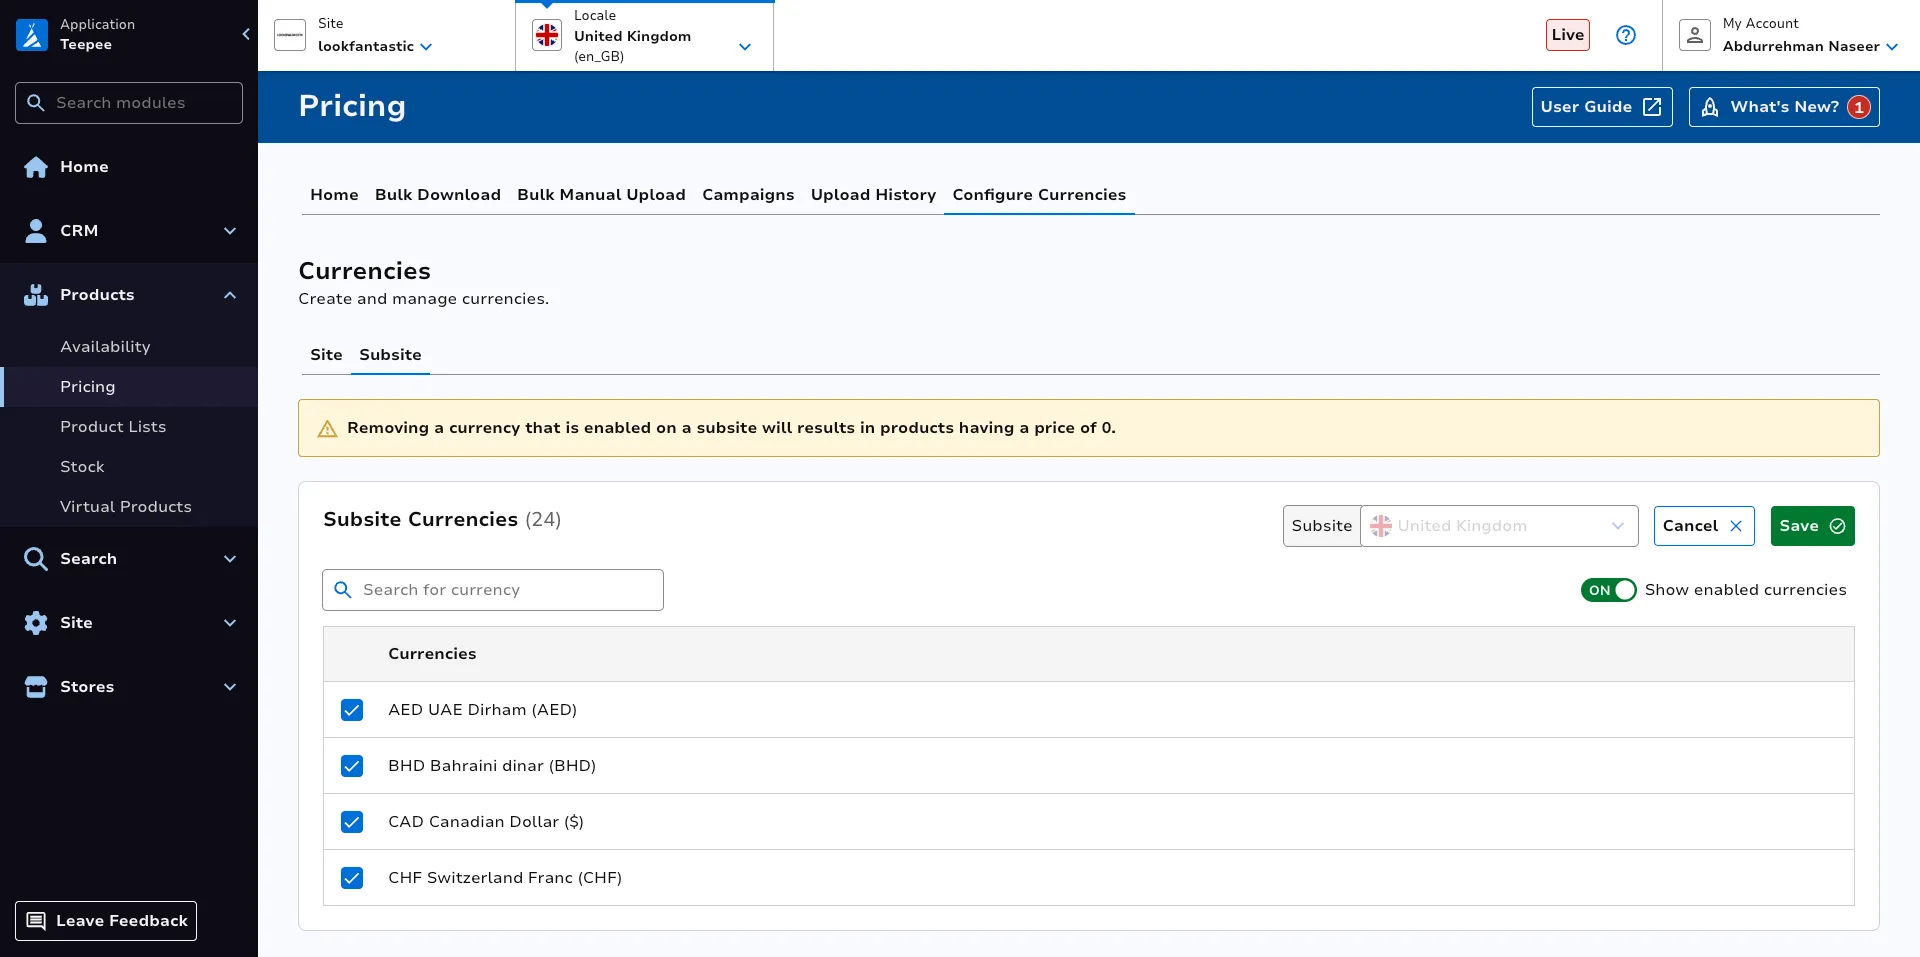
The default currency is marked with a Default label and cannot be unselected.
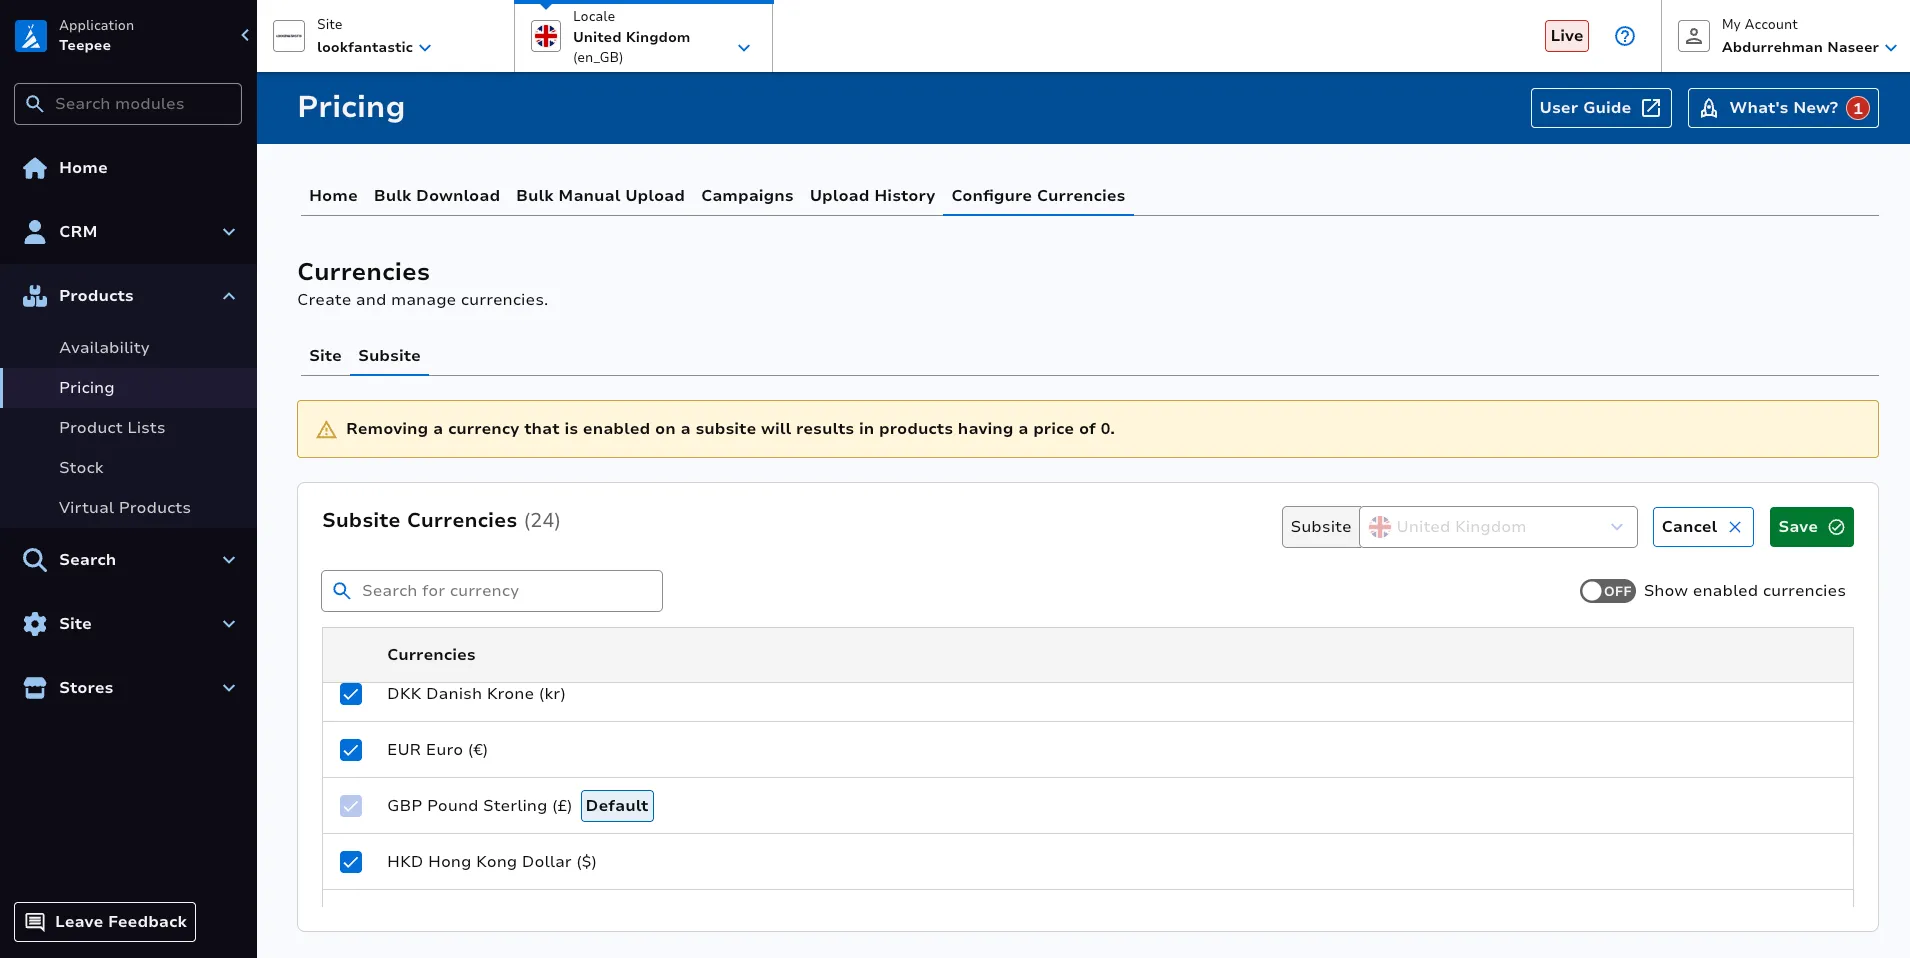
To add a currency, select it. In this case, BHD will be selected.
To remove a currency, unselect it. In this case, AUD will be unselected.
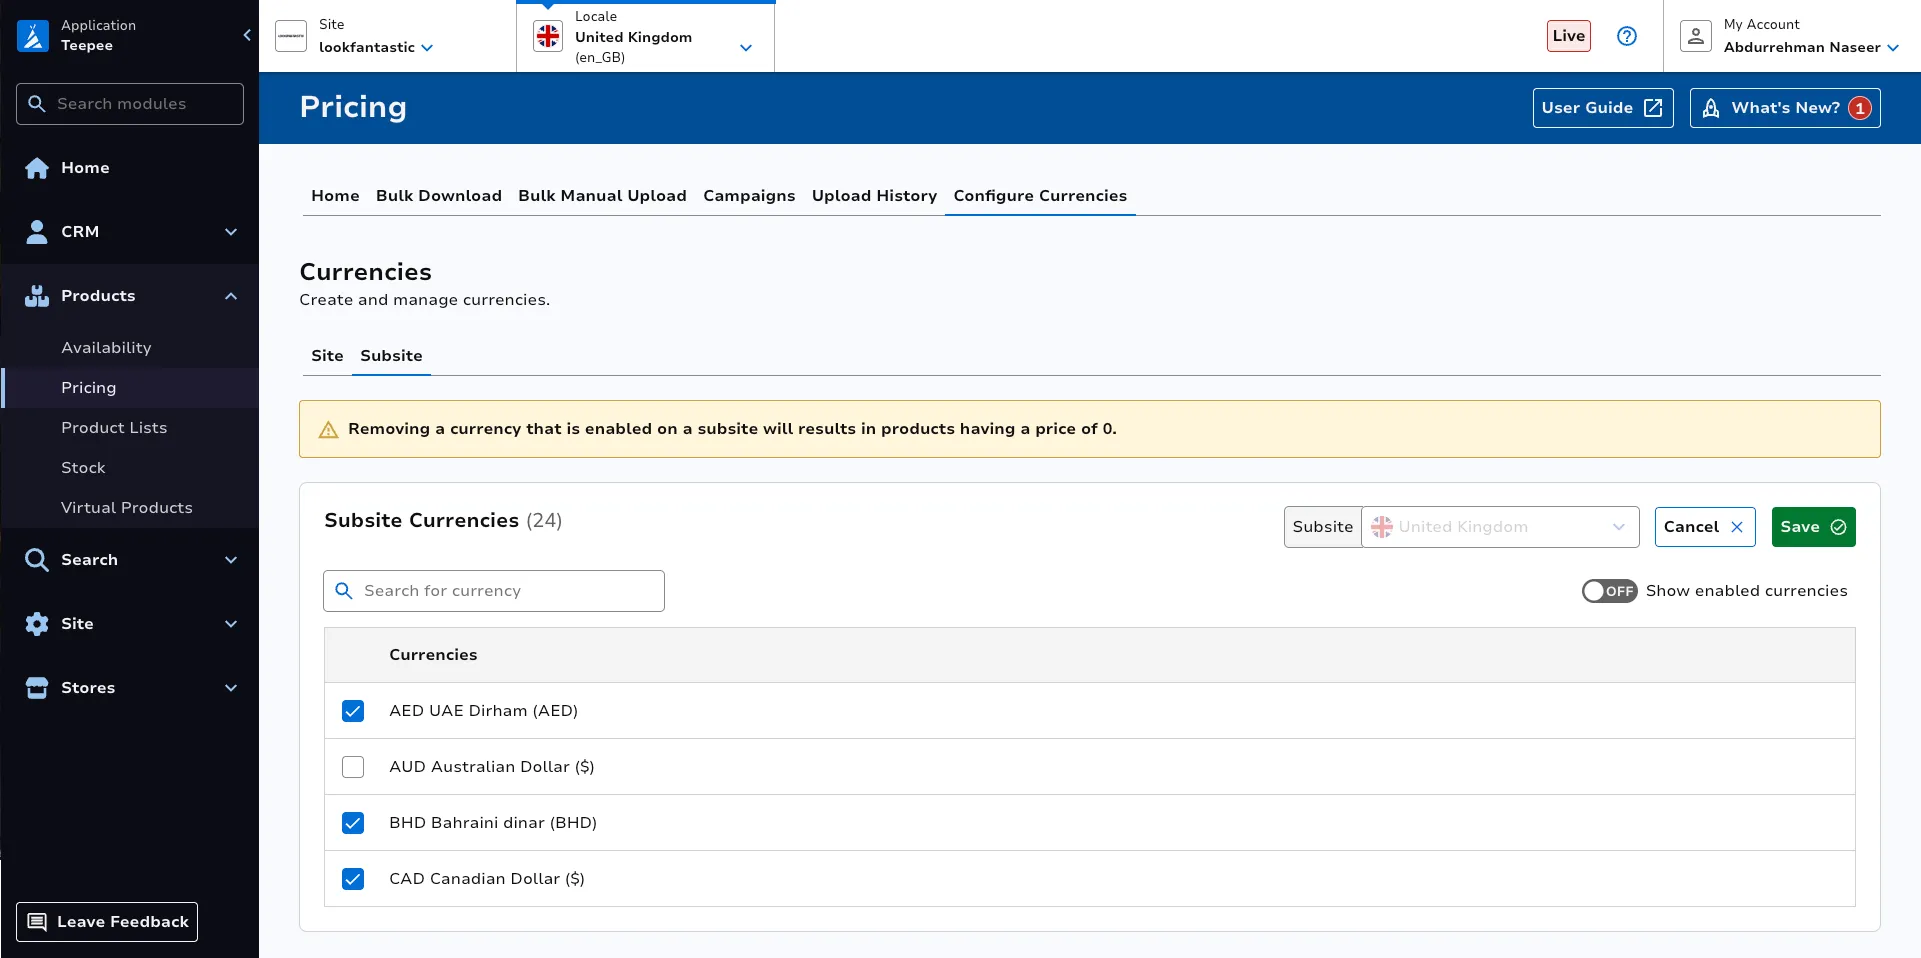
In the end, the currencies you select will determine which ones are set for the subsite. In the scenario shown, BHD will be added to the subsite and AUD will be removed.
Once you are satisfied with your selection, click Save.
Glossary
Channel
The terms Channel and Site are used interchangeably. Examples would be ‘Look Fantastic’ or ‘MyProtein’.
Country Groups
Price changes are set against country groups, as a way to apply pricing to a group of countries. Examples include ‘Channel Islands’, ‘Asia’, ‘Worlwide’ (which generally means ‘rest of the world’).
For sites which have many subsites, country groups are rarely used.
For small sites who only have a couple of subsites, country groups are sometimes used as a way to change pricing depending on which country the customer delivery address is in.
I.e. consider a site which only has one subsite en_US; if shipping from the US site to countries in both Asia and South America, these continents could be classed as different country groups, in which case prices could be set higher for all countries in country group ‘Asia’ than those in country group ‘South America’ (to allow for the fact shipping would be more expensive).
DDL
A product list is a selection of products, generally used to determine which products will appear on a given list page on site. A DDL, short for Data Driven List, is an automated method of grouping products into a list. DDL queries are based off product content items, for example ‘brand_name’. DDL queries use the following syntax: fieldName:"fieldValue" on string fields or fieldName: [num1 TO num2] on numeric fields. You can combine these constraints together with AND, OR and - (to negate).
Fallback
If the selling price for a product has not been set for a specific subsite, country group and currency combination, the price shown on site will default back to other pricing within the system in the following order:
Falls back to the default selling price within same subsite
- Falls back to the default currency selling price within the same country group (if populated), uses exchange rates to convert to the customer’s specified currency
- Falls back to the same currency selling price in the default country group (if populated)
- Falls back to the default currency selling price in the default country group (if populated), uses exchange rates to convert to the customer’s specified currency
- Falls back to the Catalogue product RRP which is always in GBP (final fallback - GBP RRP is mandatory field upon product creation so is always populated), uses exchange rates to convert to the customer’s specified currency
Product List
A product list is a selection of products, generally used to determine which products will appear on a given list page on site. Product lists are either a manual selection of products, or data-driven (see DDL).
Subsite
By subsite we mean a combination of a Channel (e.g. Look Fantastic), and a Locale (e.g. en_GB).